Thursday, October 30, 2014

Food Web Project

This year, my kids are using my Year Long Country Study Project to cover all of their Science and Social Studies standards.  Each child chose a country and they will study that country all year.  Each month, we focus on a different topic.  We spend the first three weeks doing research, watching videos and reading books.  Then during the last week, the kids create a project and a write up which they add to their LiveBinder compilation project.

Last month, we worked on Geography and the kids created maps.  (See the maps they created in the blog post: Salt Maps Solidfy Understanding.)  This month, we worked on Habitats and these kids created food webs:


5th Grade – China Mountain Habitat

china food web

2nd Grade – Russia River/Forest Habitat

food web

Creating these food web projects gave us a chance to reinforce vocabulary like predator, prey, carnivore and herbivore.  The kids also had a chance to talk about where on the food web different types of animals fell.  My 2nd grader told me “I’m glad I’m not a small herbivore.  Look, everything eats the Pika!”  My 5th grader realized that humans are the only predators for some large carnivores.

Heidi Raki of Raki's Rad Resources

Tuesday, October 28, 2014

Finding Similarities Behind Language Can Help ESL Students Build Vocabulary

As a teacher at an International School, many of my students were English Language Learners. Even my native English speakers were living in a non-English speaking country. Due to my unique teaching position, I have had some readers ask for tips on teaching English Language Learners. Here is this week’s Tuesday TESOL Teaching Tip:

ESL Teaching Tip of the Week:  Help students to find cognates or similar words between English and their home language.  This helps promote memory of English vocabulary and an understanding of language rules.  Ideas and resources from Raki's Rad Resources.

We can never forget that our ESL or ELL students have a wealth of knowledge in their own language, including a ton of vocabulary words that possibly have similar roots with English.  No matter what the home language of my students, every student I have ever taught has been able to find cognates and similarities between their home language and English.  They key is getting kids to look for them.  Often students see English as a completely foreign identity with no connection at all to the languages they speak at home.  The more students are encouraged to look for these similarities, the more that they will find that they already have a base of words and grammatical structures built in to their understanding.

Some ways to help students build up these understandings are:

1.)  Have students jot down key vocabulary words in their home language.  This is the reason that my ESL Vocabulary Packets all start out asking students to write each word in their home language.  It helps students identify similarities and cognates, while building up their English vocabulary.  (Depending on a wide variety of factors, including literacy level and home environment, some students may not have academic language in their home language.  You may allow students to translate the words if you feel like the cognates and roots will help them to remember the English – or to enhance their home language vocabulary. )ESL Teaching Tip of the Week:  Help students to find cognates or similar words between English and their home language.  This helps promote memory of English vocabulary and an understanding of language rules.  Ideas and resources from Raki's Rad Resources


2.)  Have students create a Venn Diagram, comparing their home language and English.  This could be done with a specific set of vocabulary words, with grammar rules, or simply about the languages in general.

ESL Teaching Tip of the Week:  Help students to find cognates or similar words between English and their home language.  This helps promote memory of English vocabulary and an understanding of language rules.  Ideas and resources from Raki's Rad Resources 3.)  Have students write the same sentence – in English and in their home language, and then diagram both sentences.  This will encourage students to look not only at the similarities and differences of the vocabulary, but also the grammatical structure.

ESL Teaching Tip of the Week:  Help students to find cognates or similar words between English and their home language.  This helps promote memory of English vocabulary and an understanding of language rules.  Ideas and resources from Raki's Rad Resources

I’m always looking for new tips and ideas, so feel free to leave a comment with your great tips and ideas for helping ESL students recognize cognates.

Heidi Raki of Raki's Rad Resources

Monday, October 27, 2014

Differentiated Center Activities

Centers are not one size fit all!  All instruction should be differentiated to meet the needs of students, including math and literacy centers.  Stop by Raki's Rad Resources for ideas and resources.

Center activities – available in rotations or checklists (Click HERE to see my rant post on why I don’t do center rotations.) - give teachers the perfect opportunity to differentiate and truly meet the needs of our students.  During literacy or math centers, students DO NOT have to be doing exactly the same thing, that is the nature of this time.  However, I often see many teachers who have all students rotate through three IDENTICAL centers and the only time that students are receiving any individualized consideration is when they are at a teacher’s guided reading/ guided math table.  In my opinion, this is a complete waste of what could and should be individualized instructional time. 

Of course, setting up more individualized instructional centers requires a bit more set up. One key to simplifying the process is to have similar, but different, centers available, so that students are working on the same concept, but at different levels.


For example, when I taught 1st grade, my literacy centers most often looked like this:

Word Family Station #1 - Playing with Word Families: Students were assigned to either work on self-correcting puzzles (for my lower level students) or file folder games (for my higher level students).   

Centers are not one size fit all!  All instruction should be differentiated to meet the needs of students, including math and literacy centers.  Stop by Raki's Rad Resources for ideas and resources - ACK family self correcting puzzle     Centers are not one size fit all!  All instruction should be differentiated to meet the needs of students, including math and literacy centers.  Stop by Raki's Rad Resources for ideas and resources - ACK family file folder game

Word Family Station #2 - Reading Word Families: Students were assigned to either read word wall cards and match them with other word wall cards that had the same word (for lower level students) or making word centers (for my higher level students).


Centers are not one size fit all!  All instruction should be differentiated to meet the needs of students, including math and literacy centers.  Stop by Raki's Rad Resources for ideas and resources - ACK family word wall cards    Centers are not one size fit all!  All instruction should be differentiated to meet the needs of students, including math and literacy centers.  Stop by Raki's Rad Resources for ideas and resources - ACK family making words center


Independent Reading Station:  Students chose books from leveled boxes and read, and complete their reading journal.

 Centers are not one size fit all!  All instruction should be differentiated to meet the needs of students, including math and literacy centers.  Stop by Raki's Rad Resources for ideas and resources - primary reading journal

Listening Station:  Students listened to self selected stories from a variety of bookmarked story reading websites.  (Find great websites for listening centers in this blog post.)  Then, they shared information about what they learned on a simple listening log.

Centers are not one size fit all!  All instruction should be differentiated to meet the needs of students, including math and literacy centers.  Stop by Raki's Rad Resources for ideas and resources - listening center


In addition to differentiating by general ability, I would often differentiate the word family centers with which word family different students were working on, giving lower level students the chance to re-do the same word family over and over until they achieved success and built fluency and allowing the higher level students to challenge themselves with more difficult word families and harder vocabulary.  Each center started out the year with 41 different word families available and students chose the word families that were assigned to them.

Since I don’t rotate, my students did not move in set groups, so I would have a laminated class list at each center.  At the beginning of the week, I would note word families I would like each student to work on next to their names – using a dry erase marker.  This was a simple way of changing out my centers often without having to do much work. 


This concept can also be used in math.  When I taught 3rd grade, my math centers would most often look like this:


Calendar Books:  Students each received different calendar books, depending on their level.  The covers looked the same and everyone had the same “number of the day”, so it looked like everyone was doing the same thing.  However, my low level students were working on basic number properties like expanded notation and base ten blocks while my higher level students were multiplying and dividing the same number by 10 and 100.

Centers are not one size fit all!  All instruction should be differentiated to meet the needs of students, including math and literacy centers.  Stop by Raki's Rad Resources for ideas and resources - calendar books   Centers are not one size fit all!  All instruction should be differentiated to meet the needs of students, including math and literacy centers.  Stop by Raki's Rad Resources for ideas and resources - calendar books


Fast Fact Practice:  I laminated fast fact quizzes and put them in a center with a kitchen timer.  Students practiced those facts over and over with a dry erase marker and a tissue.  Each quiz was hole punched and organized into a binder by operation. Like with word families, I keep a laminated class list at this center so that students knew which level to work on.


Centers are not one size fit all!  All instruction should be differentiated to meet the needs of students, including math and literacy centers.  Stop by Raki's Rad Resources for ideas and resources - Addition Fact Quizzes    Centers are not one size fit all!  All instruction should be differentiated to meet the needs of students, including math and literacy centers.  Stop by Raki's Rad Resources for ideas and resources - Division Quizzes

Problem Solving Practice:  My students used Problem Solving Path for problem solving practice, which isn’t differentiated, except by grade level.  However, students worked through each monthly journal at their own pace, so some students completed all 10 journals in the course of the year, while others only completed 4.  (I did set a requirement of at least one per trimester, simply to cover required grades.)


Centers are not one size fit all!  All instruction should be differentiated to meet the needs of students, including math and literacy centers.  Stop by Raki's Rad Resources for ideas and resources - Problem Solving Path


Critical Thinking Practice:  Students used tiling puzzles to work build their critical thinking skills.  Students were given their puzzles as a stapled packet of 10 puzzles, differentiated by their level (some starting with addition, others multiplication).  As students completed one packet, they would turn it in for a No-Homework Pass, and the next level of puzzles. 


Centers are not one size fit all!  All instruction should be differentiated to meet the needs of students, including math and literacy centers.  Stop by Raki's Rad Resources for ideas and resources - tiling puzzles     Centers are not one size fit all!  All instruction should be differentiated to meet the needs of students, including math and literacy centers.  Stop by Raki's Rad Resources for ideas and resources - tiling puzzles


Since I did so much differentiation, I now have a TON of resources that are available at different, differentiated levels.  Take advantage of this to save time in your own classroom and download any of the resources I discussed in this blog post at my Teachers Pay Teachers store. 


How do you offer your students a differentiated/ individualized center experience?

Heidi Raki of Raki's Rad Resources

Monday, October 20, 2014

Letter Sticks – A Simple Literacy Manipulative

My youngest son is working on letter recognition and letter sounds, so I made him these easy letter sticks today.

 Craft stick literacy center - write letters on craft stick and then let kids use them to spell words, learn alphabetical order, and more.  Ideas from Raki's Rad Resources

The sticks are super simple – they are just craft sticks that I wrote letters on.  I do uppercase on one side and lowercase on the other, and always write on the front and the back, so there’s no way for kiddos to get confused.  I also make sure that I make at least two for each letter, sometimes more for those Wheel of Fortune letters (R S T L N E).

After I made these, I started thinking of all the ways that these could be used in word work and literacy centers.  So, I thought I’d share a few ideas with you:


1.)  Flash the letter – What’s the name?  What’s the sound?  Just like letter cards, this gives you an easy way to check where students are.  In fact, they can check themselves, and put the ones they know into one cup and the ones they don’t into another.


2.)  Matching uppercase and lowercase – As long as you have at least two of each letter, students can match the uppercase version with the lowercase version easily and increase their understanding of different forms of a letter.

Craft stick literacy center - write letters on craft stick and then let kids use them to spell words, learn alphabetical order, and more.  Ideas from Raki's Rad Resources

3.)  Write out their name – Being able to spell their own name is an important pre-reading skill.  Help kids to spell out their own name by having name cards available to them, and then slowly remove the name cards from the center.


4.)  Spell simple words – First copying words from word wall cards and then creating words of their own, students can use this simple manipulative to build words.  Older kids can use these manipulatives to practice spelling sight words and spelling words.

Craft stick literacy center - write letters on craft stick and then let kids use them to spell words, learn alphabetical order, and more.  Ideas from Raki's Rad Resources

5.)  Quickly change out word family words – Have students create the word family and change out the beginning.  Or have students use these in place of letter cards when playing the Making Words Word Family Centers available at our Teachers Pay Teachers store.


6.)  Work on alphabetical order – Let the kids put the sticks in order from A to Z.  Now can they do it from Z to A?

Craft stick literacy center - write letters on craft stick and then let kids use them to spell words, learn alphabetical order, and more.  Ideas from Raki's Rad Resources

How could you use this simple literacy manipulative?


Heidi Raki of Raki's Rad Resources

Sunday, October 19, 2014

Technology Should Be MORE Than a Substitute

 When new technology arrives, the first things teachers do is to try and take the things they have been doing and substitute them with technology.  These things make our prep time less, but give kids essentially the same learning experience.  Examples of this would include:

- Using a fact fact website in place of flash cards.

- Using an iPad app in places of a file folder game.

- Using a word processing program to type up a published essay in place or writing it in neat hand writing.

- Looking up the definition for a word in an online dictionary instead of a book dictionary.

- Reading a book online instead of in a paper format.

 Technology can and should do more than substitute what we could already do with pen and paper.  An opinion from Heidi Raki of Raki's Rad Resources

While all of these are good ways to use technology, technology use SHOULD NOT stop there.  Technology provides us with the opportunity to do things we weren’t able to do before.  This should be the focus of our technology instruction and technology integration.  Some examples of using technology to take students to the next level would be:

- Creating videos to explain to others the tricks to memorizing math facts. (Consider using this video planning sheet.)

- Creating a collaborative document (using a program like Google Documents) with students from a different class (maybe even in a different country) to compile information.

- Using a website like Storybird to create an online storybook using the provided pictures as inspiration, and then publishing the story to your classmates so that they can leave you comments on the website.

- Reading a book online and using the embedded dictionary function to learn new vocabulary words.  And then creating an online book report with a link that can be shared with family around the world.

- Comparing information on verified and un-verified sources when conducting internet research.

- Publishing in-class writing assignments on your blog to share with students around the world.


As teachers, we should be spending at least half of our technology time using technology to do something that we couldn’t do without technology.  Technology helps students to collaborate, to create, to find large quantities of information and to connect with students all over the world.

How do you use technology in your classroom?

Heidi Raki of Raki's Rad Resources

Thursday, October 16, 2014

Why We Decided on Virtual Dictionary Use

Due to the built in dictionary feature on our kindles, we no longer need to tote a heavy dictionary around with us.  Heidi Raki of Raki's Rad Resources

When my family downsized to prepare for our move into an RV this year, we eliminated many “things” that we owned.  We got rid of the idea of having 5 frying pans and 20 dinner plates and chose only the things that we knew we would need.  One of the hardest things for me to downsize was my book collection.  When we moved to Morocco, 3 years before I had gotten rid of all of my books, except my cookbooks, as I replaced my book collection with a handy little Kindle.  However, we brought books for the kids, and we added to it over the three years we were in Morocco.  The boys had amassed a large collection of books – plus all of the books I kept in my classroom.  Needless to say it was a big task to decide what stayed and what went, especially knowing we were going to be homeschooling.  I had certain fiction books I knew must stay and I tried to keep all of our anthologies – in order to get more bang for our buck.  But what to do with our reference books, like dictionaries?  After some hmmming and hawing, we decided that the virtual dictionaries available to the boys on their Kindles were just as good, and got rid of the dictionaries.

Due to the built in dictionary feature on our kindles, we no longer need to tote a heavy dictionary around with us.  Heidi Raki of Raki's Rad Resources My fifth grader uses the dictionary on his Kindle regularly, especially because he can simply click on a word in a book that he doesn’t know and have the definition pop up on the screen.  But then, my first grader hit the section of his language arts curriculum that deals with dictionary skills, and I held my breath briefly, hoping that we had made the right decision.  Luckily, the dictionary on his Kindle was perfect for working on guide words and alphabetical order, which are the most important skills of dictionary use anyways.  During a recent trip to the library, we did look at a hard cover dictionary – which my son observed was “really heavy”.  I’m so glad we don’t have to find room for that thing in our RV!

What reference books do you now use virtually?

For more information on our life in the RV, don’t forget to stop by our sister site – RVing with the Rakis.

Heidi Raki of Raki's Rad Resources

Wednesday, October 15, 2014

Online Graphing Tools

For two years, I was the Technology Specialist at a school in Georgia. During that time, I amassed a large collection of websites that I use with my students. You can download my E-Book of Websites for the Elementary Classroom for free from Teachers Pay Teachers or Smashwords, or, you can check back here each week for the website suggestion.

websites for online graphing

When I taught in the computer lab, one of the skills every grade level worked on was creating graphs.  My K – 2 students worked on kid friendly software that was installed on our computers and I introduced the students in 3rd – 5th grade to Excel.  While these are great options, they cost a lot of money.  Luckily, there are free, online graphing programs available, which work wonderfully in the classroom.  Here are two I particularly like:

image

Online Chart Tool


image

Create a Chart - Classic


Both of these tools allow students to choose the correct type of graph, enter data, title their graph, label their axis and customize the color scheme. Once your graph is created, the Online Chart Tool allows you to download your graph directly to your computer while the Create a Chart site gives you a printable graph. 

How could you use these websites in your classroom?

Heidi Raki of Raki's Rad Resources

Tuesday, October 14, 2014

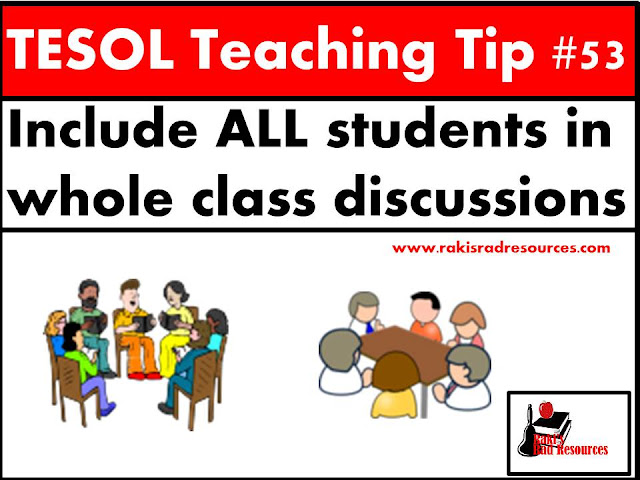
TESOL Teaching Tip #53 - Talk, Talk, Talk, Let Kids Have Discussions

As a teacher at an International School, many of my students were English Language Learners. Even my native English speakers were living in a non-English speaking country. Due to my unique teaching position, I have had some readers ask for tips on teaching English Language Learners. Here is this week’s Tuesday TESOL Teaching Tip:


TESOL Teaching Tip #53 - Let students have and participate in whole class discussions. ESL and ELL students need to use their language well in order to become proficient. Stop by my blog - Raki's Rad Resources - for strategies on how to help your students build their proficiency.

Students learning a new language MUST hear and use that language A LOT in order to become truly proficient.  However, listening to a lecture does not teach students a language.  Neither does having them simply repeat random phrases or verb conjugations.  Instead, students need to be a part of purposeful conversation where they must listen for and use key vocabulary to keep the conversation going.  This is actually quite difficult for teachers because it means – KIDS NEED TO HAVE CONVERSATIONS!  This goes against the common purpose of most teachers – getting kids to be quiet.  Now, I don’t believe kids need to spend the entire day talking, but studies show that kids who engage in conversations regularly, build their vocabulary and usage rules much quicker than kids that don’t.
So, the million dollar question is:  How do you get your students to have conversation, and still maintain decorum in your classroom?

1.)  Have clear expectations - First and foremost, you have to be sure to set up procedures in your classroom which promote positive behavior during discussion times.  Give students the expectations before hand and take time to practice having discussions from the first day of school.

Let students have discussions to build listening and speaking vocabulary - ESL Tip from Raki's Rad Resources 2.)  Begin with a set schedule -  When you are first introducing the idea of discussions to your class, have a set time that this will occur each day.  I used to start with the 15 minutes following Read Aloud.  My students would have a guiding question, which they would answer in their Read Aloud Journal while they were listening to the story. (Focused listening is great for ESL Students – find more details in this Read Aloud blog post.)  After the read aloud was complete, they would have to share their information with 3 classmates in the form of three 5 minute discussions.  Then, we would share out our answers, but students had to tell me what one of their partners had answered, or a conclusion that two students had formed during a discussion – NOT what they had written on their paper.  By doing Read Aloud Discussions every day, at the same time, in the same way, students got comfortable with the idea of discussions within a month and then I could turn around and use discussions in other subjects, at other times, and in other ways.

3.)  Choose groups wisely – With very few exceptions, I NEVER let kids choose their own partner(s) for discussions.  Children tend to choose students who are at close to the same language level as their own, which does not provide students with a chance to grow as an English speaker.  Additionally, students will choose their friends and often get off task or cause any number of management issue.  This is true no matter what age you teach – I have even found it true when teaching PD courses to teachers. :)  Instead, I try to choose partners by pairing up native speakers and fluent speakers with beginning speakers.  I also try to change partners regularly.  In my Read Aloud Discussion example above, I would give each student three partners that they would keep for the week, and then change the partner groups each Monday.  Sometimes I would change all three partners, but more often I would change out one at a time, so that students had a balance of consistency and change.

4.)  Be a part of the discussion – Make yourself a possible discussion partner.  Remember, you are your students’ best role model.  They need time to talk to you and hear you speak just to them.  This practice also gives you a chance to clearly model your expectations to your students, and do quick informal assessments of where their listening and speaking skills are developing and where they are in need of more assistance.  (Anecdotal note time!)

Let students have discussions to build listening and speaking vocabulary - ESL Tip from Raki's Rad ResourcesNow, the second question I often hear from teachers is:  When in my lesson should I let students discuss?  There is no right answer to this.  Whenever and wherever it feels right to your class is when it should be a part of your lesson.  However, here are some examples of where I find it easy to fit in discussions:
1.)  Book talks – read aloud, guided reading, novel studies, etc.

2.)  To answer guiding or essential questions – for a unit, a lesson, or for the school year

3.)  To clarify a new idea or concept in math (or science, or history, or whatever subject you’re introducing new content in.)

4.)  After doing research – in a jigsaw technique, students can share the information they learned with others

5.)  When brainstorming answers to a problem – great for justifying the answer to a problem

6.)  During current events conversations in Social Studies – great for building on Point of View

7.)  While peer editing essays and stories – give and get feedback, quick and painlessly

8.)  When compiling lists of current background knowledge on a given topic – think the K in the KWL chart

9.)  To clarify the meaning of a video or lecture watched in class
10.)  During peer tutoring sessions – have students help each other to find the correct answer, but they must explain the correct way to find the answer, not do the work from them.

One of the best things about have student discussions is that you will find that students will begin initiating meaningful, English conversations on their own.
Heidi Raki of Raki's Rad Resources

Wednesday, October 8, 2014

Puzzles, Puzzles, Puzzles

five ways to incorporate puzzles into the classroom - suggestions from Heidi Raki of Raki's Rad Resources

Puzzles help students to build critical thinking skills, problem solving abilities and logical, step by step thinking.  All of these thinking processes are the same thinking processes that are necessary for students to think out a math problem, make connections between things they read, and understand scientific processes.  So, why aren’t all of our students doing puzzles in class every day?  Mainly because puzzles are seen as an “extra” that we play with when we have some extra time.  With everything teachers have to have in their lesson plans, puzzles often feel like something we don’t have time for.  So, how do we find the time for puzzles?

1.) Use puzzles to teach or practice content.  Self correcting puzzles can help students use puzzles each day.  In my teachers pay teachers store, you can find self correcting puzzles for word families and for a variety of math topics.  If there is a topic you’d like a puzzle for that I don’t already have in more store, you can download my Self Correcting Puzzle Template and create puzzles for any topic you need.  These puzzles make great centers and small group activities and encourage all of those thinking skills that puzzles initiate.

five ways to incorporate puzzles into the classroom - suggestions from Heidi Raki of Raki's Rad Resources    five ways to incorporate puzzles into the classroom - suggestions from Heidi Raki of Raki's Rad Resources

2.) Model how to solve puzzles while modeling how to solve math word problems.  Tiling puzzles are often extremely challenging for students when they are first introduced.  Because of this, I recommend working through the first puzzle with students in a modeled “think aloud” process.  When modeling puzzles like these, take the time to highlight for students how similar these same thinking processes can be used to solve a word problem.

five ways to incorporate puzzles into the classroom - suggestions from Heidi Raki of Raki's Rad Resources   five ways to incorporate puzzles into the classroom - suggestions from Heidi Raki of Raki's Rad Resources

3.)  Use puzzles to practice geography.  Include map puzzles into your Maps and Globes unit.  Let students take the time to put together those continents or the states of the US and they will have a much more concrete understanding of how those locations relate to each other. 

 4.)  Let students have 5 minutes each day to work on puzzles as an activator.  Set up four or five regular jigsaw puzzles in empty pizza boxes.  Small dollar store puzzles work best as they tend to be very small when complete – and they’re cheap!  Assign students to a puzzle by simply writing their names on the top of the pizza box (this is a great time to build in differentiation by leveling the pizza boxes with puzzles of different difficulties and grouping your students accordingly).  At the beginning of your math block, set a timer for five minutes and let the students get their pizza box and work on their puzzle until the timer runs out, in an exercise to warm up their brains and get them ready for critical thinking.  When a group completes a puzzle, hand out a simple award (I like stickers.) and replace the puzzle with a new one.

 5.)  Assign puzzles for homework.  Students and parents alike complain about homework, but who is going to complain about working on a puzzle?  Send home tiling puzzles once students have had some exposure to these types of puzzles or have students work on puzzles using a website like Jigzone.com.

What interesting ways do you have to incorporate puzzles into your classroom?

Heidi Raki of Raki's Rad Resources

Saturday, October 4, 2014

Using Photobucket in the Classroom

Photobucket is a photo saving and photo sharing website that has been around for a long time.  I have used this website for personal uses – saving pictures of my sons to share with family, saving pictures of items I am selling to be able to share easily on forums and Craigslist, etc. etc.  However, it’s only recently that I have started using Photobucket in my classroom.  I started using it as a means of sharing class pictures with parents, but have found that it can be used for so much more than that.  Here are some ways to use Photobucket in the classroom:

5 Ways to use photobucket in the classroom - how to share class photos with parents and class, share anchor charts, document field trips and build an online portfolio - ideas from Raki's Rad Resources.

1.)  Sharing Class Photos – I’ll start with the easy one.  Class photos can be uploaded into password protected photo albums, which allow you to upload pictures with student faces and names, which often can’t be used on class blogs.  Give the parents the password through your newsletter or weekly e-mail and you can upload pictures once a month or so, to give parents (and grandparents) a way to peek into your classroom.  Parents love the protection you are providing their students and the ability to download pictures that they would like to print for scrapbooks and photo albums.

5 Ways to use photobucket in the classroom - how to share class photos with parents and class, share anchor charts, document field trips and build an online portfolio - ideas from Raki's Rad Resources.


2.)  Sharing Anchor Charts – Anchor charts can be amazing teaching tools, but when the lesson or unit is done, where do you put all of these beautiful charts?  Why not take pictures of them and upload them into a photo album on photobucket?  Then, link the album to your class blog or your edmodo account and students can re-visit these anchor charts at home for homework help, while working in a small group with access to a computer or iPad (great for BYOD classrooms), or you can be bring it up and project it for the whole class when you need to refer to it again later – great space saver!

5 Ways to use photobucket in the classroom - how to share class photos with parents and class, share anchor charts, document field trips and build an online portfolio - ideas from Raki's Rad Resources.

3.)  Saving Student Work for Online PortfoliosOnline portfolios should include links to virtual projects, but even in our technology based world, all projects shouldn’t be virtual.  Some students do much better with creating hands-on projects out of clay.  There is still a place in our classroom for building posters and dioramas.  We don’t want to leave those projects out of portfolios, but it is quite complicated to sit down with each student and upload pictures into online portfolios.  But, if you take pictures of projects and upload them into an album on photobucket, students can have easy access to them when it is time to put their portfolios together.

5 Ways to use photobucket in the classroom - how to share class photos with parents and class, share anchor charts, document field trips and build an online portfolio - ideas from Raki's Rad Resources.

4.) Keep Student Taken Photos for Projects – My class always spends a lot of time creating virtual projects (Prezis, Live Binders, Glogs) and videos (Check out my blog post on online video creation.)  Often students need pictures to put into their projects.  First of all, this is a great time to talk to students about royalty and royalty – free pictures.  Get students used to the fact that they SHOULD NOT copy and paste images from any old Google search as early as possible.  Part of this lesson for my kids was always, is there a way you can create your own image to go in there?  We talked about taking our own pictures to use in our projects.  (See my blog post on different ways to use an iPad camera.)  For example, one of my students was creating a video to teach others how to tell time and she wanted a picture of a clock.  So, she took a picture of our classroom clock and imported it into her Powtoon video.  These images that are taken by your class, can be stored in a photo album on Photobucket.  By putting the photos into a photo album, they can be shared amongst the students in your class.


5.)  Document Field Trips – When you take a field trip, let students document their trip with individual, or group cameras (or iPads).  After the field trip, upload all of the pictures into a photo album on Photobucket and view the photo album as a whole class.  Pictures show us point of view.  Take time to discuss how some students viewed the trip vs. how others viewed it.  Can students find something in the photo album that they hadn’t even noticed on the trip?  Create a summary of learning that happened on the trip, and use this as a time to connect the trip back to what has been going on in class. (Find more ideas for field trips in this blog post.)

5 Ways to use photobucket in the classroom - how to share class photos with parents and class, share anchor charts, document field trips and build an online portfolio - ideas from Raki's Rad Resources.

What “outside of the box” way do you use Photobucket in your classroom?

Heidi Raki of Raki's Rad Resources