Showing posts with label Collaborative Project. Show all posts

Monday, February 27, 2017

10 Ways to Make Projects Work for Low Level Students

Recently I wrote a post about why low level/ low income students need projects as much as higher level students. After I wrote this post, I had quite a few questions about how to implement projects with low level students. So today's post is 10 Tips to Making Projects Work for Low Level Students:

10 Tips to making projects easier for elementary students and lower level students - classroom suggestions from a seasoned teacher at Raki's Rad Resources.

1.) Model clear expectations - Be very clear about what you want your students to do, step by step. I often have these steps written out, like in my Math Projects, AND I discuss them with the students before we begin. Then be ready to explain the expectations again when students get stuck. Be patient, especially the first few times when the expectations of a project are completely new to your students. 

If possible, show students examples of possible end projects. I like to take pictures of student projects to show next year's students. You can also create your own versions of the project to help them have a good visual of the expectations.

2.) Share rubrics with students BEFORE they begin working - Just as you want them to know what the end project will look like, you want them to know what their grade will be based on. With worksheets students generally understand what they have to do to get a good grade. With projects there are many ways to work hard but not be focused on the "correct" key elements they'll be graded on. For this reason, before we begin working on our projects, I always go over the grading rubric with my students. I point out the things that will cost them or gain them points so that they know how to get a good grade.

3.) Gather resources - Lower level students will often benefit if they have specific resources to use, rather than just being asked to "Google it". Especially during the first few projects, I gather together books, articles, videos, website links and other resources where I KNOW my students will be able to find the information that they need. 

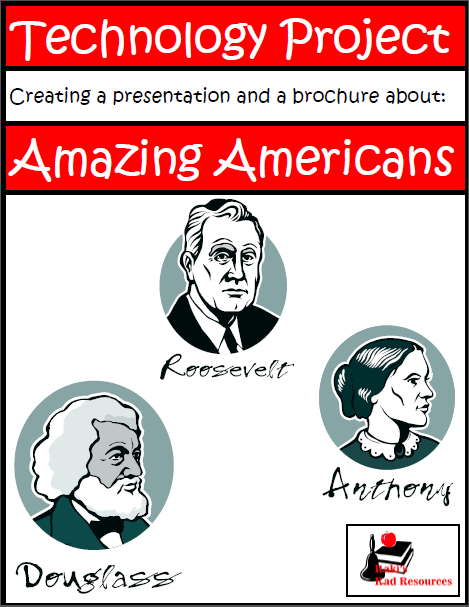
Often, I may even have students complete an Internet Scavenger Hunt on the same topic before we begin a project. This way the students have been led through the research and built up their background knowledge before they're being asked to create a project with this information. For example, I may have the students complete the Amazing Americans Internet Scavenger Hunt first, which covers 9 different American heros. Then we'll do the Amazing Americans Project where they choose one hero, do further research and create an informational power point about the person.

4.) Prepare "background building videos" - Similar to gathering resources, I often spend time building up our background before we begin a project. I often do this with videos. Right now my students are working on the research for the Ancient Civilizations project of their Country Study. Before they began researching their own individual countries' ancient civilizations, we watched multiple videos about ancient civilizations in general. We started with videos about civilizations in general and then moved into videos on the move of people from generally nomadic to generally agricultural. We also watched videos about archeology and how we learn about these ancient civilizations. All of this background helps our low level students to better digest their individual research because they have a frame of reference already built for them.

5.) Be ready to "guide from the side" - Projects are a great way to build independent work skills, but this is an area where most low level students are lacking. Be careful not to take over your students' projects, but be ready to guide your students with a well posed question or a suggestion of how to find their answer. Make sure students are still the ones who are researching or creating, but be available to them when they get stuck. 

6.) Start with group work - Group projects provide their own set of challenges, especially the meshing of different personalities. However, group projects also allow higher level students to model good study skills for their peers. This is true even in a "low level class" because you will always have a few students who are higher in level than other students. Often the first few projects of the year will be group projects with the work broken up differently each project. This way students learn what is expected of them and have a chance to have someone other than you help them out. 

Group projects can also help out the teacher because instead of having 20 different projects going on you might have 4 or 5 to focus on. This means less resources to gather and less chances of a project needing you to prop it up. Eventually you will want your students to work on individual projects so that they have the chance to find an individual area of interest but as you are starting out, group projects can ease the work load both for the students and for you.

7.) Develop procedures for projects - Just like any other activity you are going to do in your classroom, you will need procedures. In my classroom some of the project procedures include: 
 - Students who are working on projects have first priority on a computer or tablet.
 - Students work on their projects at the same time every day. (Country study gets done first thing in the morning. Math projects get done during math centers. Research projects get done during our literacy block.)
 - Students are encouraged to take their projects to the floor in order to spread out, especially with poster making.
 - "In progress projects" can only be stored on one table.
 - All materials must be cleaned up and stored when we move into another activity.
 - Projects must be edited by a peer before I will do a final conference. 
 - Projects must be checked by the teacher for spelling, grammar and conceptual mistakes before they can be published. (ie. typed in a blog post or hung in the hallway)

Project procedures may differ from project to project, but as with everything else students will respond better to procedures that stay the same. So think carefully about how you want projects to look in your classroom for the school year. Then you can teach procedures once instead of each time you start a project.

8.) Allow for plenty of time - However long you think a project SHOULD take, double it. Especially with low level students, projects will take longer than expected, so allow for that time. This might mean starting a project before you start a unit. Or you might continue working on a project from one unit while you move into another unit. This is okay. Call it preview or review. Either way, I'd rather allow plenty of time for a project and have my students (and myself) feel we succesfully completed the project, than to rush through it just to be done "in time". In fact most teachers that I know who get frustrated doing projects are frustrated because the students don't finish in the time they allotted. The teacher often then throws the project out, leaving both teacher and students feeling like they didn't accomplish something. Prevent this feeling by allowing plenty of time. If students finish early, awesome! That gives you more time for revising, editing, publishing and sharing. I'd always rather my students feel like they finished too early than to have them rushing because I didn't allow enough time.

9.) Start out slowly - I've been doing student projects for 10+ years. Right now in my classroom I have three different projects going on simultaneously. We are almost done with our Be an Architect Math Project where we are designing our dream school. We are right in the middle of our Ancient Civilizations project (which is a small part of our larger, year long Country Study Project). And we have just begun the research for a City Comparison Project. My students started doing projects during week 2 of the school year.

However, my first year in teaching we did 4 projects during the entire school year. For a long time I never had more than one project going at the same time. You don't have to try and do what I do or what any other teacher does. If you've never done projects before, choose one small project and try it out. When you're done, take some time to hash out what worked and what didn't. Then choose another project that's slightly bigger and try it, maybe even after you've taken a significant break. Use your reflection to build better procedures or guide your students differently.

Don't overwhelm yourself, just give projects a good solid try. Eventually you (and your students - no matter their level) will find your groove with projects. Projects can and should be fun for you and your students. They should also make your job easier, not harder. Projects that are working well will allow your students to begin to "teach themselves". Projects should also decrease the amount of grading you need to do. I'd always rather grade one solid project, which integrates several skills than ten seperate worksheets.

10.) Celebrate the results - No matter how the projects turn out, take time to celebrate. End projects will often look different than what you dreamed about when you were planning. However, that final project is the result of your students' learning and persistence. Take time to celebrate that learning with your students.

Allow students to share their projects with someone else as well. This could be their own classmates, another class, their parents or even administrators. Students DO NOT have to stand in front of the class to share out their projects. Check out this old blog post on 4 Ways to Share Projects Without Standing in Front of the Class. No matter who your students share with, watching them get excited about the work they did is one of the best parts of doing projects with students, especially low level students.

If you're ready to start projects in your room, but you're not sure where to start, consider one of these projects from my Teachers Pay Teachers store:

10 Tips to making projects easier for elementary students and lower level students - classroom suggestions from a seasoned teacher at Raki's Rad Resources. Online Book Report


10 Tips to making projects easier for elementary students and lower level students - classroom suggestions from a seasoned teacher at Raki's Rad Resources. Rock Research Project


10 Tips to making projects easier for elementary students and lower level students - classroom suggestions from a seasoned teacher at Raki's Rad Resources. Biography project


10 Tips to making projects easier for elementary students and lower level students - classroom suggestions from a seasoned teacher at Raki's Rad Resources. holiday recipe math project


10 Tips to making projects easier for elementary students and lower level students - classroom suggestions from a seasoned teacher at Raki's Rad Resources. plants needs experimentation project


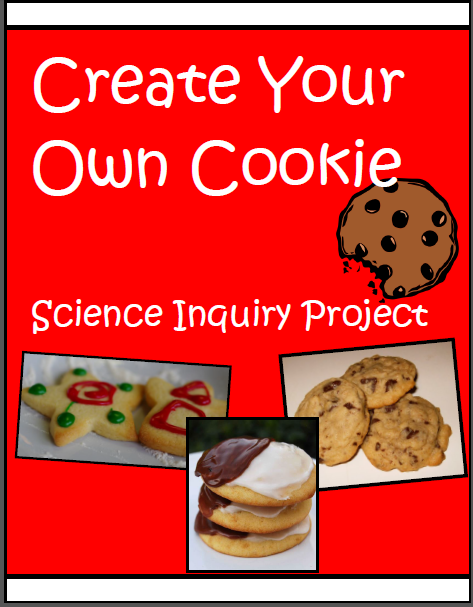
10 Tips to making projects easier for elementary students and lower level students - classroom suggestions from a seasoned teacher at Raki's Rad Resources. create your own cookie science inquiry project


10 Tips to making projects easier for elementary students and lower level students - classroom suggestions from a seasoned teacher at Raki's Rad Resources. earth day video project


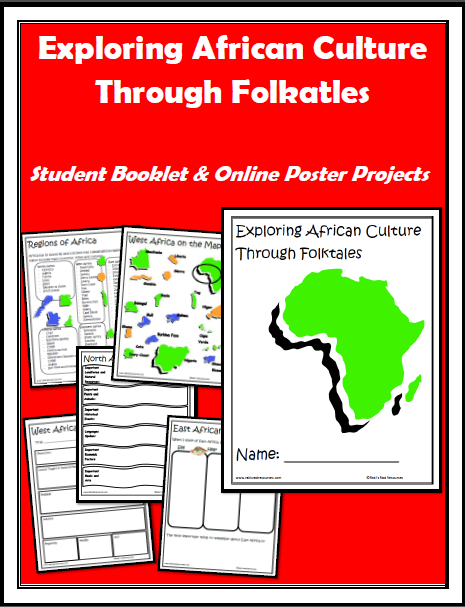
10 Tips to making projects easier for elementary students and lower level students - classroom suggestions from a seasoned teacher at Raki's Rad Resources. african folktales online poster project


10 Tips to making projects easier for elementary students and lower level students - classroom suggestions from a seasoned teacher at Raki's Rad Resources. Amazing Americans technology project


Sunday, December 27, 2015

Differentiated Instruction - How, Why and Ten Different Strategies

The Why
Recently I read an article that said that many teachers believe that differentiation is just a catch phrase or a passing phase of education. Many believe that it’s not something that can or will actually get done in the classroom. There are many catch phrases and passing phases in education, but I don’t believe and I sincerely hope that differentiation is not one of these because I have seen it work in my classroom. Differentiation is the best chance to give each child what they need. In a classroom of 20 or 30 kids, differentiation is hard work, and we may not always succeed at differentiation 100% of the time. But I honestly believe that all teachers Kindergarten through 12th grade and beyond should be trying their hardest to differentiate each and every lesson that they teach because each and every student deserves to have an education that meets their needs. No teacher has the ability to sit one on one with each and every student for the entire school day and meet the needs of each student, but we do have the ability to differentiate in many different ways so that we are getting at least closer to our goal. The idea is to walk into each and every lesson saying how can I get very close to meeting the needs of ALL of my students, no matter what their level.

Now I’ve taught in real classrooms with students who are easily 2 grade levels apart or more in ability. I’ve taught in classrooms with high percentages of ESL learners. I’ve taught in classrooms with special education populations. I’ve taught in first grade classrooms, third grade classrooms and mixed age classrooms that had students ranging from 2nd through 5th grade. I even taught technology to K – 5 students. In each and every classroom I’ve ever worked in I have differentiated instruction to the best of my ability. I understand that differentiation can be extremely intimidating, so if you’ve never differentiated your classroom before, choose one section of the day to differentiate at first. This will allow you to put a toe into the differentiation pool without jumping in all together. Then as it becomes more natural for you, let it flow into your other subjects, sections, classes, etc. However, stepping into differentiation, into giving students what they need as an individual learner, will change your teaching and more importantly your students’ learning.

The How

So now that I’ve explained the why, here’s the how. How do I do this? What does it look like? Realistically differentiation can and should take place in many different ways. For me it often looked different depending on the subject. In reading it often looked like guided reading groups, literature circles and student peer reading. In spelling it often looked like a tiered assignment through leveled lists. In math it often looked like ad hoc groups based on a bi-weekly assessment. In science and social students I often used jigsawing, student selected topics and tiered questioning. In technology I use teacher selected student peer tutors. Today I will give you ten differentiation strategies that I have used and that will help you better meet the needs of your students. For each strategy, I will show you how it might look in your classroom, what subjects you can use it with and give you some additional suggestions for implementation. Before you can begin to differentiate, you need to identify the needs of your students through assessments, conferences, observations and just generally getting to know your students.


10 Differentiation Strategies for any classroom at any level. Differentiation allows teachers to give students what they need all the time. Try these strategies and tips from Raki's Rad Resources

 1.) Tiered or Leveled Assignments
What is it?
Tiered assignments consist of the same general assignment with a variety of levels. You can offer your assignment in as many different ways as you want. I generally try for 3 or 4 levels and put the kids in the closest level to their true level because making the 7 or 8 levels that I truly have is generally not feasible. Tiering means that all of the students in your class are doing the same thing – practicing spelling words, doing puzzles, learning problem solving, etc. However the problem set, the word list, the type of puzzle, or the depth of the topic is what is differentiated.

What subjects is it best for?

Tiering can work in any subject or grade level. It works best with assignments that have a specific process that students should be doing like problem solving or working on a spelling pattern or analyzing informational articles. Tiering works best when the content can be changed easily, without changing the process.

What will it look like?

The teacher will give the same general instructions to everyone. Then students will receive different materials. These materials can be completed individually, with a partner, or in small groups, depending on what you as a teacher want. If students are to work with others, be sure that the students know who else has the same materials as they do. This might mean that students with the same materials work in the same area of the classroom or it might mean that their materials are color coded so that they can see who has the same material as they do. For a look at a tiered assignment I did with my class, check out the blog post - Keeping them Moving while Learning; Finding Angles on the Playground

What resources might help me with this?

Calendar books allow students to have the same cover with different work pages. Students all work on their calendar books for twenty minutes a day. They all work on math concepts, but the actual math concepts that they work on can be differentiated to eight different levels.

 Spelling and vocabulary packets allow students to all work on the same spelling pattern each week with four different levels of word lists. The activities for each of the levels are similar, but progressively more challenging.

-----------------------------------------------------------------------------------------------------------------------------------------

2.) Semi-Permanent Grouping
What is it?
Groups that can work together for long periods of time are semi-permanent groupings. Students might work in these groups with you or by themselves. Groups can consist of students who are all the same level so that they can work on the same skills together. Or groups can consist of low, middle and high level students show that they can work together on a problem with some students guiding others through the activity. These groups are labeled as semi-permanent because they can and should change as the need arises, either for academic or social reasons. Teachers should track how groups are doing together and change groups accordingly.

What subjects is it best for?

Guided reading groups are of course the first thing that comes to mind when we think of semi-permanent grouping, and literature circles can also be classified this way as well. However, semi-permanent groups can be used any time students will be working on the same or similar types of activities over a long period of time. Groups that are done homogenously with time to meet with the teacher are great for specific skills that take a long time to build like reading comprehension, the writing process, math problem solving, the scientific method and using geography.

What will it look like?

The entire class can be broken into semi-permanent groups that are all meeting at the same time. Or one group may be meeting, either on their own or with a teacher, while the other students are working on a completely different assignment. For example, I often pulled my guided reading groups while the other students worked at their own pace through a list of assignments. Students who were called to my table left what they were doing, came to me and worked until we were done and then returned and picked up where they left off once we were finished. Other teachers like for students to move with their semi-permanent groups through a series of activities like centers or workstations, switching at assigned times. I explain this process more in my blog post – I Don’t Do Center Rotations and Here’s Why.

What resources might help me with this?

Students in semi-permanent groups can work together on any variety of novel studies. All of the students in your class can be working on novel studies at the same time if you wish, but each semi-permanent group can work on a different novel that is appropriate to their reading level or interest.

Students can work in semi-permanent groups to complete internet scavenger hunts to work on internet research as well as science and social studies topics.

-----------------------------------------------------------------------------------------------------------------------------------------

3.) Ad Hoc Groupings

What is it?
Ad hoc groups work together for short period of times. Students might work in these groups with you or by themselves. These groups generally consist of students who are all the same level so that they can work on the same skills together. Every once in awhile you might want groups can consist of low, middle and high level students show that they can work together on a problem with some students guiding other students. These groups are ad hoc because they change quickly and may only meet for one class period or less. Teachers can remove students from an ad hoc group as soon as the students have mastered the concept or completed the activity.

What subjects is it best for?

Any topic that has specific skills that might need to be reviewed or previewed with a specific group of students is a great topic for ad hoc groups. Ad hoc groups are generally formed after an assessment, grouping together students who need to work on a specific skill together. If you are using ad hoc groups to preview a topic, then you would pull students who generally need more assistance. For example, you might pull your English Language Learners and preteach them the vocabulary for the unit before the entire class begins the unit. This gives them a little additional time to process the information, as well as helping them to be prepared to handle harder work when it begins.

What will it look like?

The majority of the class works on an independent work assignment or practice activity while the teacher pulls an ad hoc group to work on a specific skill. The teacher works with the group until she feels they have a good enough grasp of the concept to leave the group. Students may all leave the group at once or the teacher might release students one at a time. Once the student is done with one ad hoc group, she might pull another ad hoc group. Some of the students from the first ad hoc group might be in the second ad hoc group as well.
When I used ad hoc groups, I took all of my assessments – usually a bi-weekly math quiz – and compiled a list of each skill covered. Next to each skill I made a list of the students that needed to review each of these skills. These groups became my ad hoc groups that I met with during the next few classes. I worked with the groups until I felt like everyone had a good grasp of the skills, and then we moved on to the next set of skills. While I was working with ad hoc groups, the remainder of my class worked on Problem Solving Path and Tiling Puzzles, so they continued to be engaged in work on math skills that were appropriate to their level even if they weren’t working with me.

What resources might help me with this?

The work that students are doing with their ad hoc groups is generally teacher led and linked directly to an activity that is already done or already planned. So the larger concern for teachers is “what is everyone else doing?” The following resources provide quality, engaging work that students can do independently while you are working with ad hoc groups:
Math
Problem Solving Path
Tiling Puzzles

Reading

Reading Response Journal
Reading Logs

Language Arts

Writing Journals
Spelling & Vocabulary Packets

Science & Social Studies

Internet Scavenger Hunts
Vocabulary Graphs
-----------------------------------------------------------------------------------------------------------------------------------------

4.) Teacher Selected Peer Pairs, Peer Tutoring or Peer Groups

What is it?
Students work together in pairs or small groups, helping each other through activities. Teachers choose the groupings, purposefully putting higher level students with lower level students. The students help each other while the teacher floats and helps the groups that get stuck.

What subjects is it best for?

Peer tutors works best when you have a class where about half of the class understands the concept and the rest of the class is either confused or just not quite there yet. Peer tutoring and peer groups work best on small, specific topics, not big general subjects.

What will it look like?

The teacher will create the groups and assign the activity whole group. Students will be assigned to work on a very specific problem or activity related to their topic. The pairs or small groups will then break apart and work together on the assignment. The teacher will circulate and help where she is needed.
My favorite way to use this in my classroom was to assign writing prompts to work on specific types of skills like writing a solid introduction or using clear and concise details. I would give a prompt at the beginning of class and specifically tell the students that everyone in the group MUST contribute to the prompt in order for it to be successful. If I saw a group struggling, I would often guide my higher students by asking them to explain to their friends how they came up with their ideas. This often got students in the habit of explaining their thinking for the benefit of themselves and others.
Two notes on using peer tutors. #1 Do not use the same peer tutor groups all the time. One student should never feel responsible for the complete education of another. They should be helping one another, not being their one and only teacher. #2 Try not to label your students as tutors and tutees to the children. They don’t need to be told who the stronger student is, and framing this activity this way will bring about confidence issues. Instead, frame this activity as students working together on an activity and sit back and watch the students learn from one another.

What resources might help me with this?

Students can work together on any topic that they need help on. Here are a few resources that work well when working in pairs:
Math Projects
Grammar Quizzes
Area and Perimeter Worksheet
Story Elements Bookmarks
-----------------------------------------------------------------------------------------------------------------------------------------

5.) Collaborative Learning Groups in the form of: Jigsaw, Inside Outside Circle, Think Pair Share

What is it?
Students either do independent research on a topic or share what they already know on a topic to the rest of the class. This is accomplished by splitting the class into randomized groups. Each group presents to another group or the entire class so that by the end of the class everyone knows what each individual in the class knows.

What subjects is it best for?

Personally, I like to use collaborative learning groups to break up a large topic into much smaller topics where each student or group becomes an expert on that smaller topic and shares their knowledge with the rest of the class. This type of collaborative learning works best with science, social studies and health topics where students need to learn about facts and concepts. However, these collaborative learning groups can also be used to report out about books read, to share math strategies or to check for understanding after watching a video or listening to a lecture.

What will it look like?

Jigsaw – The teacher will break the class into a set number of groups. The groups will get together to gather or put together their knowledge by answering questions or preparing a short presentation on a small section of a larger topic. This may happen over several class periods. Then, on one predetermined day the class will jigsaw. Half of each group will stay at their designated table while the other half of their group circulates in a structured way visiting each other group. While visiting, the group that stayed will present their information from their small section to the students that are visiting them. Ideally the visiting students will record this information on a graphic organizer or in a notebook. Then halfway through class the students will switch places. Those who were visiting will becoming sitting presenters and the sitting presenters will become visitors until all students have visited all groups.
Inside Outside Circle – Before beginning, the students will prepare a short thirty second presentation on their tiny piece of a larger topic. This many happen over several class periods.  Then, on one predetermined day the class will circle. The class will stand in two circles, one inside the other. The inside circle faces out and the outside circle faces in so that students in each circle are facing each other. At that time the inside students have 30 seconds to present. Next the outside students have 30 seconds to present. Then the students each move one student to the right and repeat the process until everyone on the inside circle has talked to everyone on the outside circle. Note that with this strategy everyone does not talk to each other student so it is okay to have some overlap of topics covered.
Think-Pair-Share – This strategy is most often used during lectures to give students a chance to digest what is being discussed. However, it could easily be turned into Research-Pair-Share if you want to do it more as a differentiated learning activity. In this way each pair of students has a question to answer. Each pair might have a different question or they could be looking at different possibilities to answer the same question. They research (or think of) the answer independently. Then they are allotted time to talk about it with one partner. Finally each group shares a quick summary of what they learned with the class.

What resources might help me with this?

For me collaborative learning is best if connected to a larger research project. So I might have students research, collaborate to build understanding and then create their project after the collaboration when they have more knowledge. Here are a few projects I have used collaborative learning with:
Important Americans Project
Rock Project
African Folktales Project
-----------------------------------------------------------------------------------------------------------------------------------------

6.) Projects with Choices

What is it?
Students complete a project on a topic that the class is learning about, but within the project they have choices. They might be able to choose their subtopic. They might be able to choose the types of information they want to gather. They might be able to choose how they will present their information. Or they might be able to choose a combination of those things. The general idea of projects is that students are given autonomy and an opportunity to take ownership over their learning, while still keeping them within a general framework of the standards that must be covered.

What subjects is it best for?

Science and social studies are obvious subjects for projects, but math projects can contain a lot of choices as well. In my Party Planner Math project students choose their own theme, their recipes, their guest list, their venue and decorate their own invitation. Within literature, students can have a lot of choice about how they present the information in books they read. Really projects can be used for any subject at any grade level as long as teachers take the time to make sure that the project is appropriate for the students.

What will it look like?

Projects can be handled in many ways. Students might be allotted half or all of the class periods for a certain number of days while everyone works on their projects at the same time. Or students might work on their projects as independent work when other class work is completed. Or students might work on their projects independently as a teacher works with semi-permanent or ad hoc groups. Personally I like to start out the year with students all working on their projects at the same time while I circulate to assist. But as the year goes on and students build an understanding of how to do research, how to work independently and what my expectations are, I use projects as independent work while I work with groups. And by the end of the year I add projects to the end of my students’ to do lists so that they have additional time to work on their projects as soon as they complete assigned work. This means if you come into my classroom in March it is fair game to see me working with a group of 3 or 4 students while other students work on textbook pages or a classroom assignment and the students who are done with those, but not needed by me are independently working on projects.

What resources might help me with this?

There are so many possibilities for projects. Here are a few I have available:
Math Projects
Biography Project
Country Study Project
Important Americans Project
Earth’s Minerals Project
-----------------------------------------------------------------------------------------------------------------------------------------

7.) Choice Boards

What is it?
Choice boards are a grid or list that gives students options for how they will conquer a task. Generally students will all work on the same standard, the same topic and the same questions, but will present or explore the information differently depending on their choice off of the choice board.

What subjects is it best for?

Choice boards work great when you want students to work with material in their own way. They are great for giving options on presenting, but choices can also be given for how are you going to intake the material or how are you going to explore the material. For example if you are learning about Ancient Rome, students could have a choice between reading the chapters in the textbook, watching a designated list of videos, or researching the answers to specific questions. No matter which method the student chooses, they will learn the important information, but the choice lets them pick the way that they are most comfortable with. Or if students are learning about algebraic equations, they might get to choose between creating practice equations for a friend or creating a song to explain how to solve an equation or creating a Venn Diagram to compare and contrast equations and inequalities or writing a short essay on the topic.

What will it look like?

Using choice boards will look different depending on whether you are using them at the receiving information stage, the exploring information stage or the presenting information stage. At the receiving information stage, students will be given their options at the beginning of the lesson. They will choose one and the teacher should be clear that whatever they choose they will be required to stick with. They may choose something else next time, but for today once chosen they can’t change. This cuts down on time wasted. Once they choose, they will be given an allotted amount of time to gather their information, taking notes along the way. Notes may be taken in a graphic organizer or any other note taking system that students are already familiar with. Once the allotted time is complete – be sure to give students enough time to find the information noting that it might take more time than giving a lecture, but students will remember more if they find it themselves – come back together as a class. Ask various students to briefly share out what they found, or use one of the collaborative learning exercises from earlier.
At the exploring information stage, students will receive their information in the same way, whether from you, from a video or from their own research. Then they will take the information and manipulate it, turn it around in their head and shape it like virtual playdoh. In this way, students are building understanding. So for an allotted amount of class time, students will be asked to work independently on a choice from the choice board. Your classroom will look similar to if they were all working on the same assignment, but because of the choices students will be building their own connections. A powerful example of this for me was interactive math notebook reflections. Students have five options of the way they can reflect on what we have covered in our math mini lesson and math reference page. Each student chooses the one that means the most to them. My artistic students often chose to design posters. My analytical ones chose to create diagrams. My writers chose to do a paragraph. My logistical students created practice problems. Everyone was working on the same topic. Everyone was learning. Everyone was building individualized knowledge.
At the presenting information stage, students have built up knowledge in a topic until they are ready to present that knowledge to the class. When they are ready to present, they are given choices as to how they will do that. Some students love to stand in front of the class, but many don’t, so give them options. Can they create a video? Can they create a podcast? Can they create a piece of art? Can they write a story or a song? Can they create an interactive poster? There are so many ways to present information. In fact I wrote an entire article on Four Alternatives to Standing In Front of the Class. These are ten options you can give your class when it comes time to make a presentation choice board.

What resources might help me with this?

Many of my projects have built in presentation choice boards or lists including:
Historical Figures Project
Black History Project Matrix
Country Study Project

Additionally all of my Math Interactive Notebook lessons include exploration/reflection choices.

-----------------------------------------------------------------------------------------------------------------------------------------

8.) Student Paced Learning (To-Do Lists)

What is it?
In student paced learning, students work at their own pace through a list of set activities. They spend more time on the items that are difficult for them and less time on the items that aren’t, rather than waiting on others to be finished.

What subjects is it best for?

While I generally used student paced learning in literacy based areas, it can be done in any subject area. The Cult of Pedagogy Podcast recently featured a teacher using student paced learning in a middle school math class. Students could also work their way through European history or the Periodic table on their own if given the correct supports.

What will it look like?

This is one that is going to look very different depending on the class and the level. In my intermediate elementary grades classroom, student paced learning looked like a list of things that had to be done for the day or the week. Students checked them off as they completed them. The list always included open ended items at the end like projects, puzzles and independent reading so that I rarely heard “I’m finished!” With older students the list might be all of the lessons for a month or a school year that students work through at their own pace while you are there to answer questions, assist, guide through problems, give small group tutorials, etc. Overall the thing to remember is that student paced learning does not mean learning without the teacher. It means that the teacher provides the student with materials – in written, audio or video format – ahead of time so that students can work through it at their own pace. It also means that you have taught them what to do when they get stuck.
Student paced learning takes a lot of important “front end” work. Teachers prepare the materials and teach students the structure at the beginning, which means that the first few weeks of school you are teaching hard and heavy. But once students get the structure and the flow, you get to step back and be the guide on the side. You have time to give students one on one or small group instruction on what they need when they need it. You have the chance to let your students take control of their own learning.

What resources might help me with this?

Pretty much any kind of learning can be pre-loaded, it’s just a matter of taking the time to pre-teach it. However it is easy when things are already copied, bound and ready for the entire year. So I suggest choosing systems that last all year long so that you don’t have to reteach all of that important pre-teaching. Here are some year long systems that might help:
Country Study Project
Reading Journals
Writing Journals
Tiling Puzzles
Problem Solving Path
Self Correcting Puzzles (for Primary Grades)
Internet Scavenger Hunts
-----------------------------------------------------------------------------------------------------------------------------------------

9.) Let Students Be the Teacher

What is it?
When we teach, we learn. So letting students be the teacher is a great way for them to cement their own understandings on a topic.

What subjects is it best for?

Teachers teach every subject, why can’t students? However, I do generally try to limit students to a narrow topic for each individual lesson they are going to teach, as students can choose broad, wide ranging topics without realizing how much work is really entailed.

What will it look like?

Students should plan out their lesson ahead of time. The lesson plan is more important than the delivery of the lesson, because this is the time when they are getting their information in order and making sure they actually understand what they think they understand. Time for this planning should be set aside in class. Your classroom will look similar to if they were all working on an independent work activity, but in reality they are solidifying their learning while they plan this lesson. One of the things they will plan is how they will teach the lesson. Will they stand up front and lecture? Will they create a video? Will they create a series of fun activities? Will they create a game? Will they make a student paced project?
Once the planning is complete, this will look like any other project. Students will plan out their work, they will create their presentation or their game or their manipulatives and then on a designated time, they will teach the rest of the class their lesson. You may want to give students a set amount of time that they may have to teach their lesson in order to have enough time for everyone in the class to teach. Or you may want to have students teach their lessons as they complete them in a student paced type of system.

What resources might help me with this?

With my students I have created video lessons and vocabulary games to teach others about topics:
Tutorial Video Planning Sheets
Vocabulary Game Planning Sheet
-----------------------------------------------------------------------------------------------------------------------------------------

10.) Student Led Inquiries/ Passion Projects

What is it?
Student led inquires are a chance for students to follow their own thought processes and find answers to their own questions.

What subjects is it best for?

If your subject is one that students can use in a real world application, we hope that they have real world questions about your subject that might be answered. For some students it might be as simple as “When am I going to use Physics in my real life?” to start out with. But then as time goes on it might be “How do I use Newton’s laws when I’m designing my own rollercoaster?” or “I wonder how much force a car would have to have to push over a stop sign?” The idea of an inquiry is to get students answering their own questions, so inquiry can be worked into any subject.

What will it look like?

Inquiries can have a wide range. Some inquiries will be similar to Genius Hour, 20% Time or Passion Projects where students choose their own topic, their own questions and their own presentation or project on any topic that suits them from writing poetry to learning sign language to developing a website. These type of inquiries are great for Language Arts classes because students are reading and writing and researching and covering all of your standards, but what about Math and Science and Social Studies? For those classes, you might need to be more specific about what kind of questions you want them to have.
For example, during a unit on heat, I asked students to come up with a list of questions they had about heat. The students brainstormed about 30 questions total, which we listed on the board. Then the students, who were broken into groups of two and three, chose a questions and worked on answering it. The questions ranged from how do you make a fire? to why does a refrigerator get hot if it’s making things cold? to how do you build a blowtorch? While students were doing their research, they learned about ignition, combustion, conduction, convection, insulation, the movement of heat particles, and much more. I didn’t lecture about it, they wanted to know about it, they went and found it out and then they taught the rest of the class what they learned. And they covered all of my standards. The same could be done in other subjects.
Ask math students for questions about coordinate graphs or algebraic equations or balancing a checkbook. Ask history students for questions about Ancient Greece or the Middle East or Victorian England. Ask literature students for questions about Shakespeare or Charles Dickens or haiku poetry. Ask music students for questions about instruments or famous musicians. This one works for everything!

What resources might help me with this?

Create Your Own Cookie Inquiry
Great Plant Experiment
-----------------------------------------------------------------------------------------------------------------------------------------

As you can see from my descriptions, I often use multiple strategies together to form a truly differentiated classroom. If that seems like too much for you, choose one strategy and try it out in one specific section of your day. Then slowly add more strategies and more class periods as you are comfortable.


Happy teaching!


Wednesday, September 23, 2015

Create Global Learners by Connecting with Classes Around the World

For a period of time while I was in teaching in Morocco, I managed a blog called Global Teacher Connect. On this blog, we had monthly collaborative projects where classrooms from around the world could get together to work on projects or connect students in different ways. Unfortunately, life got away from me and  I forgot to pay for the domain name and it was swooped up from under my feet and so the blog is now back to it’s old domain name: http://globalteacherconnect.blogspot.com/. In the meantime, I have also kept a Global Teacher Connect Facebook Page, which has been pretty unactive. I’d like to change that and so I’d like to change that by opening up the page as a place where teachers can connect with other teachers for collaborative projects.
Collaborative projects are a way of connecting students with other student around the world. These projects help give students a chance to connect with and understand students from different cultures and ways of life. By doing this, we open our students up to the possibility that there are other people in the world who do things differently than they do. We open them up to the perspective that other people around the world are more similar to them than different. We open them up to see the world from a different point of view. These connections open up conversations between students of different classes, different races, different cultures and different religions. Knowing people from other cultures makes people less likely to believe stereotypes and hateful messages about people who are different than themselves and more likely to try and see the world through the eyes of others. For a long time, teachers have been using pen pals as a way to connect students to other students around the world. Penpals are a great first step, but with today’s technology there are so many other ways to connect students to other students around the world. Here are a few ways you might consider using to connect your students with other students around the world:

10 Ways to Use Technology to Connect our Students to Students Around the World - Ideas in this blog post can be used in any classroom for elementary, middle or high school. You may also connect with other teachers on our Global Teacher Connect Facebook page. Stop by and find out more at Raki's Rad Resources

1.) Skype Chats – When I first moved to Morocco a teacher from Canada contacted me because they were studying Morocco and wanted to talk to a class of kids from Morocco. We sent e-mails back and forth two or three times and then we arranged a chat where our kids “met” face to face via computer screen. Her kids taught us a song and my kids taught them a song. Although the arrangement was to teach her kids about Morocco, my kids learned about Canada at the same time. They were amazed to see pictures with piles of snow and loved their virtual tour of the Canadian classroom.
How else could we apply this?
What about talking to students who live on a Native American reservation during our Native American unit? Wouldn’t that be a great way to show students that Native Americans today live just like we do, even though they had different houses long ago?
What about talking to students who live in the Democratic Republic of Congo during a study of the rainforest? Wouldn’t that be a great way to help them understand that people as well as animals live in these areas?
What about a series of chats with classes from different continents during a geography study? Could your class create a map of where each class was located?
For more ideas on how to use Skype in the classroom, check out my blog post – Bringing Experts into Your Classroom with Skype.

2.) Google Doc Collaborative Writing – My oldest son is currently writing a a story with his best friend. We are in South Dakota. She is in North Carolina. Sometimes they set a time and work together. Sometimes they each work when they have time. Either way they are building a chapter book together without actually being together.
How else could we apply this?
How about letting students do research together. They could add to a list of research questions. Then they could answer the questions as they find them and combine the efforts of different students in different places with different sets of resources.
What about a book review document where students from different classes can add reviews of books they have read?
For more ideas on how to use Google Docs, check out my blog post – Using Google Docs to Aid in Collaboration.

3.) Edmodo Book Groups – Within Edmodo you can create groups of students. These groups of students can work together on various projects. Students can be added to groups from any class. This would be the perfect place to host a student book group. Students can read the book in assigned sections and come to the group to answer questions or chat about the book.
How else could we apply this?
What about an author study group? Students could have a group devoted to a particular author. They could come back and work with the same students on different books throughout the course of a school year – or longer!
What about a non-fiction group based on a topic? Say you have kids that are very interested in the Middle Ages, or dinosaurs, or India. Put together a group, with members from at least 2 classes, where students read a bunch of books on that topic and discuss what they learned.
For more ideas on how to use Edmodo in your classroom – check out my blog post: Edmodo Makes my Flipped Classroom Easier.

 4.) Virtual Problem Solving Challenge – A great way for kids to practice math skills is to come up with their own word problems. Students could then share these problems with students from a different class, somewhere else in the world, by posting them on a blog, sending them by e-mail or even putting them into a Google Doc. Kids build critical thinking skills and global thinking all at once.
How else could we apply this?
Allow students to “critique” as well as answer problems created by their friends. This will be a great time to talk about vocabulary that is specific to a region or dialect. It is also a good time to talk about what makes a good world problem.

5.) Collaborative Google Map of a Monuments and National Parks Near Each Class’ Home – Create a Google Map of monuments and national parks near your classroom and then ask other classes to add their own set of monuments and national parks to the map. Monuments and national parks are great ways of knowing what type of things are deemed important to a culture. For example, in Morocco many monuments have religious importance and you will find important mosques and religious schools preserved as “monuments”. In the US religious monuments are rare, but we have a lot of our natural resources set to the side as special and worthy of preserving. There could be some great discussions from maps like these, and by having people of an area designate their monuments, you are getting a picture with less bias than some other resources we could use for similar discussions. Students will study Geography and culture while learning about people from around the world.
How else could we apply this?
What about creating a map of the places you go to buy things? The types of stores and markets in an area will tell you a lot about the economy of an area and could be a great contribution to a study of economics.
What about creating a map of where the food of an area comes from? Students could mark their school and any farms or ranches that are located nearby. This could be a great way to talk about urban/suburban/rural situations as well as how far your food source is in different countries. It’s also a great time to talk about – do we buy from these local farms or do we buy from supermarkets who buy their food from farther away to save costs?

6.) Collaborative Video Creation Projects – There are so many ways to create videos using technology today. For a few ideas of how to make videos with your students – try my Video Creation Websites blog post or my Video Creation iPad Apps blog post. How about having a collaborative YouTube channel with other teachers. Students can create videos. You post them to the YouTube page. Then friends from other classes can go and watch their videos. The friends will learn from the videos and can even leave comments on the video. 
How else could we apply this?
What about having a specific theme to the videos? One of the Global Teachers Connect projects was to create an Earth Day video. In fact, you can still download the project outline for free at my Teachers Pay Teachers store.
How about specifically doing math videos, similar to those at Khan Academy? My kids use this Student Created Video Tutorial Sheet to create math videos to teach each other. Think of how much more we could do with those if we pooled them together!

7.) Create a Padlet to Ask People Questions – Padlet is a website that lets people add their own pictures and notes to your “wall”. Ask a question on it and anyone can answer. Send the question to a “friend” and they can pass it on from there. This could be a great way to gather information for graphs or simply to do a type of “research”, similar to when we put a question out on Facebook to our friends.
How else could we apply this?
How about working on the same project as other classes and asking them to share pictures of their completed projects on your padlet?
Why not ask each class to upload a small video of their classroom and see what classrooms look like around the world?
What about using it as another place to do a book chat? Post questions about a book and ask everyone to go in and add their thoughts.

8.) Create a Collaborative Prezi Presentation – A few years ago I had my students jigsaw information about Ancient Rome. Each group took a different section, home life, government, economics, etc. You can find all of the specifics in this old blog post. Once they had done their research, we put it together into a collaborative prezi presentation. Like Google Docs, you can work in the presentation at the same time, or at different times, but in the end you have one big presentation that everyone has contributed to.
How else could we apply this?
How about creating a research project and grouping students between 2 or more classes based on student interests? Let students break the topic into sections down using e-mail or Google chats. Then each student does some research and adds to a collaborative Prezi.
What about creating the Prezi and ask different classes to post pictures of their classroom or their school into a designated section of the presentation?

9.) Collaborative Research with LiveBinder – LiveBinders are a great way to collect resources together. You can include pictures, videos, links to web pages and words you have typed. There are plenty of LiveBinders out there created by teachers to organize resources for other teachers. Why couldn’t students do the same? Two classes or two groups could work together to research any topic you cover in Science or Social Studies and share the information in a collaborative LiveBinder.
How else could we apply this?
Why not let students create a collection of their favorite educational websites? Sometimes students are better at finding those resources than we are, let them collaborate with others and they’ll double their manpower.
How about creating a series of LiveBinders for different books? Each LiveBinder can include resources used for the books, student reviews or reflections and discussion questions created by the students.

10.) Make Graphs with Collaborative Spreadsheets – On many of the homeschool groups that I am a part of people are asking for data collection questions to help students gain access to “data”. We can do the same thing with collaborative spreadsheets – part of Google Docs. Students can ask the question and send it to a few classes who can record their data. Students can then use that data to create graphs for class. The graphs can also be created in the spreadsheet program and shared with those who supplied data.
How else could we apply this?
Why not use this in coordination with other collaborative apps? Students can vote through these spreadsheets on which novel they want to study, which project they want to use or which type of collaborative project they want to participate in.


On the Global Teacher Connect Facebook page, feel free to stop and put a shout out to teachers (or other parents if you are a homeschool teacher) to see who would want to connect for a project like these. You may also post a link to a google doc or a blog post (no paid products please!) about your collaborative project. Let’s work together to build global learners and greater understanding by all.
Heidi Raki of Raki's Rad Resources