Saturday, June 28, 2014

Educational Benefits of a Trip to the Farm

During the summer, most teachers I know spend at least some time planning for the next school year.  My favorite “planning” to do during the summer is field trip planning, because it means I get to tour cool places I’d like to take my students to – often with my own kids in tow.  Here are some of my favorite field trip locations, that can be found in most every community, as well as a list of content connections you can make for your students.  Often as teachers we only include field trips in our science and social studies, but there are lots of reading, writing and math connections that can be made in these locations as well.  I am going to share one type of field trip a week and ideas for making curriculum connections with each field trip.

field trips

 A Trip to the Farm:  Pumpkin patches, apple or berry picking, milking cows, seeing maple trees tapped for syrup, viewing honey bees or just touring a working farm, there are many variations on the the farm field trip, but all are beneficial to students, especially in our current age where many kids have no idea that food comes from anywhere other than the supermarket.

Reading:  Connect to farm stories like Charlotte’s Web, The Day Jimmy’s Boa Ate the Wash or Maple Syrup Season.  Read informational text about the working of a farm. Completing research about the process of producing the goods produced by the farm.
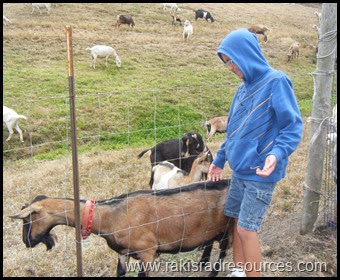
Benefits of a field trip to the farm - curriculum connections for reading, writing, math, science and social studies - from Heidi Raki of Raki's Rad Resources.Writing:  How to writing about the process of producing the goods produced by the farm.  Fiction stories with the farm as the setting.  Chronological narratives of the trip to the farm.

Math:  Bring money and purchase goods from the stand – figuring out the change they would receive ahead of time.  Figure out the elapsed time that occurs from when a baby animal is born to when it starts helping out the farmer (producing milk, eggs, meat etc.)  Create a graph with data collected at the farm, or ask to look at graphs kept by the farmer – how many eggs are collected each day, how much honey is collected each month, how many visitors come each week, etc.

Science:  Look at the life cycles of the plants and animals that live on the farm.  Create a diet chart to compare and contrast what the different animals on the farm eat.  Interview the farmer about how weather patterns affect the farm.  Look at the chemical reactions that happen in producing goods like bread, jelly, cider and cheese.

Social Studies:  Trace the production of a good produced on the farm – from raw materials to sold product.  Look at the laws and policies that affect farmers.  Research trends in farming – organic vs. chemical based; local vs. shipped etc.  Discuss how farming has changed over the past 200 years.  Have students help produce a product – pick berries, milk cows etc. making them a producers rather than a consumer.


To make field trips more educational, I often use graphic organizers and other activities to keep my students focused.  Read more about the specifics in this blog post: Field Trips Aren’t Just For Fun.  Be sure to stop by next week for another Field Trip Curriculum Connection.

What is your best field trip idea?

Heidi Raki of Raki's Rad Resources

Thursday, June 26, 2014

Student Created Virtual Field Trips

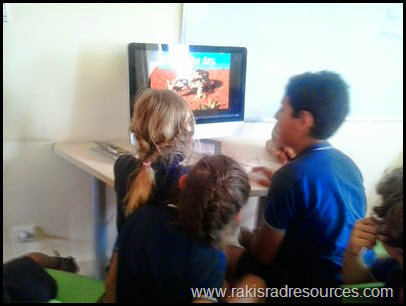
The end of the school year is a time to reflect on the best lessons and units taught during the course of the year.  For me, my best unit this year was called “Deserts of the World”, where my students explored the 20+ deserts that exist on Earth.  The unit was centered around the BBC video – Planet Earth: Deserts, which we watched to kick off our unit.

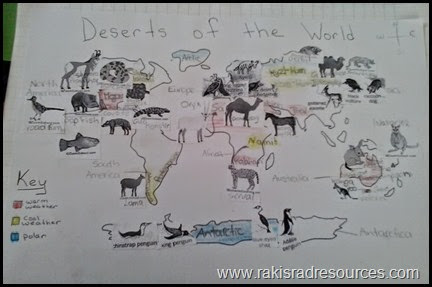
Then, we created world maps with all of the deserts labeled on them.  We categorized our deserts into hot, cool and polar deserts and added the names and pictures of multiple desert animals from each region.

 Deserts of the world unit: habitats, adaptations, desert plants and desert animals - all covered in theis all inclusive unit from Raki's Rad Resources.

Next, we learned about how plants and animals adapt to the harsh climates of these deserts by looking at the needs of plants and animals and experimenting with the needs of a plant during our Great Plant Experiment.

Deserts of the world unit: habitats, adaptations, desert plants and desert animals - all covered in theis all inclusive unit from Raki's Rad Resources.

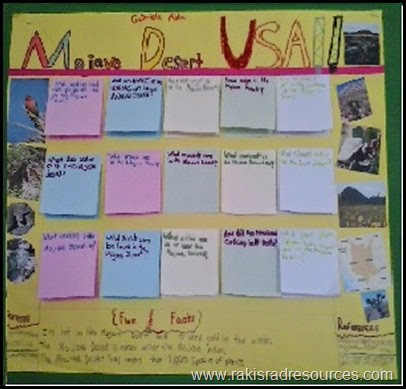
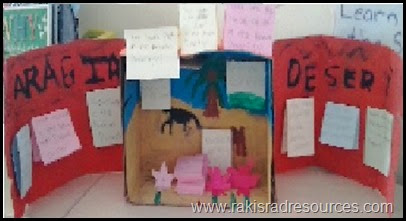
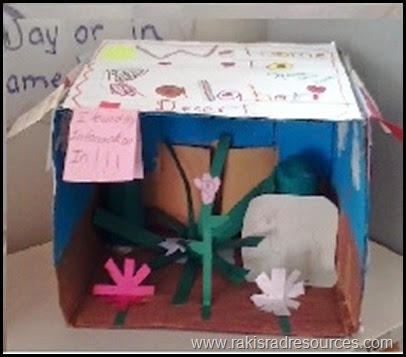
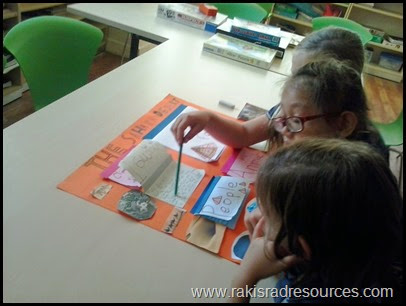
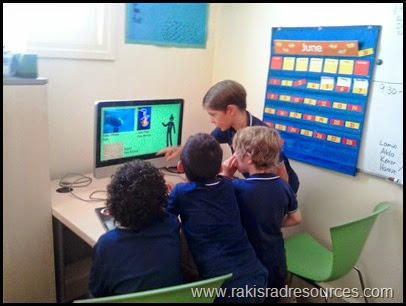
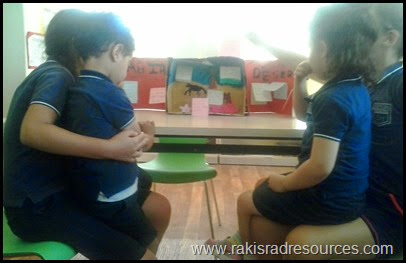
Finally, the students got a chance to choose a desert and become an expert by doing internet research.  Students used the information they found to create a Virtual Field Trip to their deserts.  They had the choice of creating a video, presentation, interactive poster, diorama or map.  Here are some of the projects that the kids made:

Deserts of the world unit: habitats, adaptations, desert plants and desert animals - all covered in theis all inclusive unit from Raki's Rad Resources.

Deserts of the world unit: habitats, adaptations, desert plants and desert animals - all covered in theis all inclusive unit from Raki's Rad Resources.

Deserts of the world unit: habitats, adaptations, desert plants and desert animals - all covered in theis all inclusive unit from Raki's Rad Resources.


Since the entire school was studying the desert, we chose a day at the end of the trimester to invite the younger students upstairs to see our projects.  We turned this into a “Desert Museum” where our students stayed put while the younger students came around and were able to “experience” each different desert.

Deserts of the world unit: habitats, adaptations, desert plants and desert animals - all covered in theis all inclusive unit from Raki's Rad Resources.

Deserts of the world unit: habitats, adaptations, desert plants and desert animals - all covered in theis all inclusive unit from Raki's Rad Resources.

Deserts of the world unit: habitats, adaptations, desert plants and desert animals - all covered in theis all inclusive unit from Raki's Rad Resources.

Deserts of the world unit: habitats, adaptations, desert plants and desert animals - all covered in theis all inclusive unit from Raki's Rad Resources.

If you are interested in doing a Deserts of the World unit with your class, you can find all of these activities – and more in my complete unit plan at my Teachers Pay Teachers store.  The unit also includes the Great Plant Experiment.

What was your favorite unit to teach this year?

Heidi Raki of Raki's Rad Resources

Monday, June 23, 2014

Good Bye ISM

For the past two years, I have been very lucky. I got the opportunity to teach with some of the best, most creative, teachers ever International School of Morocco. Working in an environment where we would walk into each others' classrooms and get inspired regularly was wonderful.  It always seemed that we were spiraling great teaching ideas off of each other. The ideas that other teachers at this school gave me inspired me to do more for my students, to push myself to allow them new and different learning opportunities, and to expand my ideas of teaching.

Before coming to ISM, I was already a strong, project based teacher with ESL experience and a thirst for technology integration.  ISM has a lot of technology for it's students - iPads, iMacs, projectors etc.  This allowed me to experiment with lots of new technologies and push my students to experiment with different programs and presentation models.  This school encouraged my Edmodo use to build community within my students.  This has been especially important for my international, English language learner population, with students from more than 8 different countries.

As a candidate for the PYP (Primary Years Program - precursor to International Baccalaureate), ISM has encouraged me to take my standard pre-fabricated projects that I have always done with students and give over the control of research, project development and evaluation to the students, with me taking more and more of the "guide on the side" role.  I found out how much I loved watching my students take control over their own learning and how much more they learned when the ideas they were researching inspired and interested them.  Inquiry based lessons and student responsibility for learning is often hard to implement, but these two years I have learned exactly how wonderful they are to have in your classroom.

Tomorrow, I will get on a plane for my new adventure - homeschooling my own children with the lessons I learned these past two years, traveling around the world in an RV, and spending time perfecting my resources to help out other teachers.  But first, here are some of my favorite moments from the last two years:


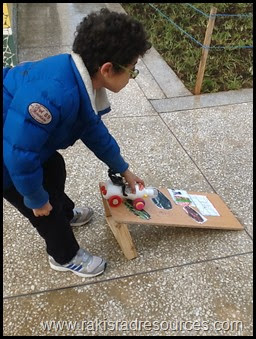
Seeing the creative designs my kids came up with when tasked to make a car that would go the furthest distance:

Best memories from Heidi Raki's two years teaching at the International School of Morocco.

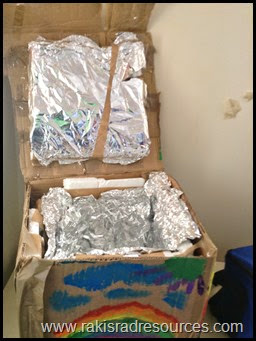
or to keep a water bottle frozen for the day:

Best memories from Heidi Raki's two years teaching at the International School of Morocco  

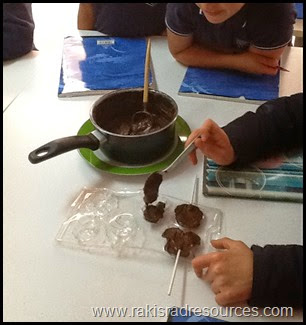
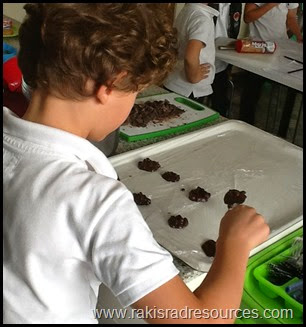
Using the kitchen to further our science lessons by making lolipops to experiment with irreversible and reversible change:

Best memories from Heidi Raki's two years teaching at the International School of Morocco

or create a real life model of different types of rocks:

Best memories from Heidi Raki's two years teaching at the International School of Morocco

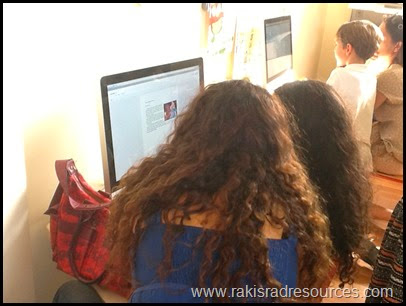
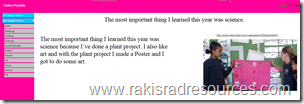
Watching students present their online portfolios to their parents:

Best memories from Heidi Raki's two years teaching at the International School of Morocco

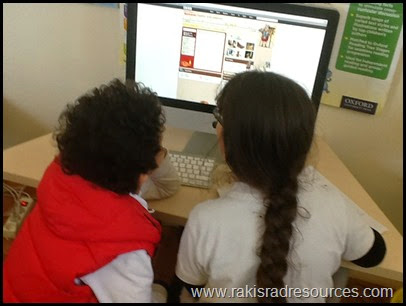
Watching my students master technologies that I hadn’t yet mastered: Prezi, Powtoon, iMovie etc. :

Best memories from Heidi Raki's two years teaching at the International School of Morocco

Best memories from Heidi Raki's two years teaching at the International School of Morocco

Getting a chance to participate in my children’s PE during swimming time – you really learn so much more about your kids when you get them in a pool!

Best memories from Heidi Raki's two years teaching at the International School of Morocco  Watching students work across age levels to help each other out on a wide range of projects:

Best memories from Heidi Raki's two years teaching at the International School of Morocco


Best memories from Heidi Raki's two years teaching at the International School of Morocco

Best memories from Heidi Raki's two years teaching at the International School of Morocco

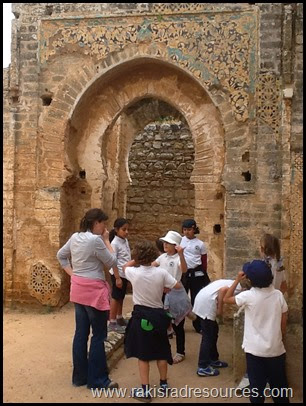
Going on some amazing field trips – from a free range beach trip to explore tide pools, to the inside of factories, to ancient Roman ruins:

Best memories from Heidi Raki's two years teaching at the International School of Morocco

Best memories from Heidi Raki's two years teaching at the International School of Morocco

Good bye ISM!  Thank you for the lessons and memories.

Heidi Raki of Raki's Rad Resources

Sunday, June 15, 2014

15 Ways to Use Sidewalk Chalk in Your Classroom

15 ways to use side walk chalk as a teaching tool - ideas from Raki's Rad ResourceWhen it’s nice outside, I am always looking for excuses to take my class outside.  A great way to plan an outdoor lesson is to incorporate sidewalk chalk into your lesson.  Here are 15 ways to use sidewalk chalk in your classroom:
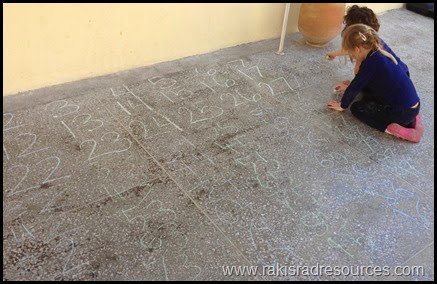
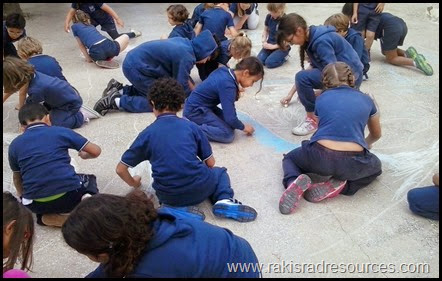
1.) Create Your Own Hundreds Chart:  Start students out with the first row of a hundred’s chart and then let students fill in the other numbers.  Once the chart is made, students can jump out number patterns and work on their addition, subtraction and multiplication facts.

15 ways to use side walk chalk as a teaching tool - create your own hundred's chart - ideas from Raki's Rad Resources

2.)  Reading Buddy Squares: Draw squares on the ground, put 2 books in each square.  Have students pair off and read the two books in their box with their partner – back to back or shoulder to shoulder.  When students have finished the books in one box, they can switch to another box.

3.)  Practice Spelling Words:  Chalk can be another great way for students to work on spelling and sight words.  Have them draw their words big enough to walk on them and they can practice their words two ways!

4.)  Vocabulary Hopscotch:  Have your students review their vocabulary with vocabulary hopscotch.  Draw out a standard hopscotch map.  Write a different vocabulary word in each square.  If students land on a word, they have to give the definition of the word in order to stay in the game.

5.)  Drawing Maps:  Students could create maps of their own, or practice sketching out world maps.  At my school, we created a world map with chalk.  Everyone helped color in oceans and label the continents.  Then we used string to add the Equator and Prime Meridian.  15 ways to use side walk chalk as a teaching tool - Draw a world map - ideas from Raki's Rad Resource

6.)  Make and Jump on Number Lines:  So many math concepts can be covered with number lines – adding, subtracting, multiplying, dividing, decimals, negative numbers etc.  Draw out a number line – have students add whatever numbers fit on the number line.  Then, have students work on equations by actually jumping on the number line.

7.) Jotting Down Unfamiliar Words: Take Sustained Silent Reading outside and give each student a piece of chalk.  Tell them that if they come to a word they don’t know the meaning of, they should jot it down on the sidewalk near them.  At the end of 15 – 20 minutes, write down all of the students’ words on a piece of paper.  Have students look up the words in the dictionary to begin the creation of a “New Words Notebook”. 

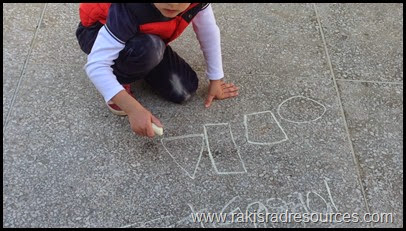
8.) Draw Geometrical Figures & Properties:  Give students a specific geometry concept to work on – every student could even work on their own topic (from a random grab bag or differentiation by design).  Have students use the sidewalk chalk to draw out their concept.  This works from simple shapes for younger students to acute angles, parallel lines, line segments, radius and diameter, etc. for older students.

15 ways to use side walk chalk as a teaching tool - work on geometry - ideas from Raki's Rad Resource

9.)  Draw Science Diagrams: Cell diagrams, genetics charts, human body diagrams – anything you can draw on paper can be drawn outside with sidewalk chalk, giving a new, kinesthetic experience to increase memory of the concepts.

10.)  Drawing and Walking Out Timelines:  Give students a real understanding of the amount of time that passed between important events by drawing out your own timelines.  Use one student foot for a set amount of time (10 years, 100 years, 1000 years).  Then add important events from your history lessons.  Finally have students walk “through history” from one event to another.  Great way to point out common misconceptions – like Martin Luther King Jr. being alive during slavery.

11.)  Coordinate Graphing: Sidewalk chalk is a great way to create a coordinate grid that is large enough to walk on.  Students can become the “points” and determine their own coordinate.  Also great for working on reflecting and translating points.

12.) Draw your Character or Setting:  Have students brainstorm ideas for their next story by having them draw out their character or setting outside with sidewalk chalk.  Then take a picture of their drawing and have them keep it handy while they are writing their story.

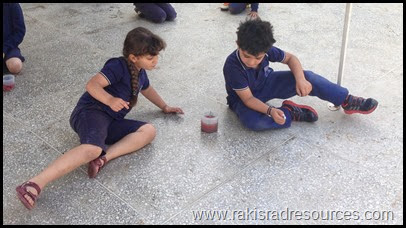
13.)  Create and Describe a Potion:  Have students create a “potion” by mixing together kitchen ingredients.  Then, have students use sidewalk chalk to write descriptive words (adjectives) and sentences about their potion.

15 ways to use side walk chalk as a teaching tool -describe a magic potion - ideas from Raki's Rad Resource

14.)  To the Races!:  Have students race paper airplanes, cars, balls, marbles, anything that rolls or flies.  Students should use sidewalk chalk to mark where each item ends.  Students can then measure the distance traveled by each item.  Great for allowing students to design their own vehicles!

15.) Create a Student Graph:  Have students create the categories for a survey.  Then, create a “Student Pictograph”, using sidewalk chalk as the axis and students as the “symbols”.


How do you use sidewalk chalk in your classroom?

Heidi Raki of Raki's Rad Resources


Sunday, June 8, 2014

Testing vs. Portfolios = Photograph vs. Video Collection

 Which would be a better indication of a child’s ability to read, a photograph of them holding a book or a video of them reading the book aloud?  No contest right, the video provides much more proof.  Even better, would be a collection of videos that show progress over the course of the year. 

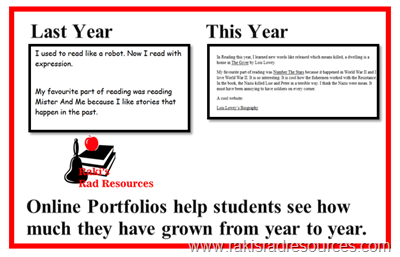
The past two weeks, my students have been working on a variety of assessments.  Some of these assessments – specifically the UK National Tests (SATs) and our comprehensive trimester tests - are photographs – snapshots of how they are performing on a particular day at a particular time.  Online portfolios help students see how they have grown from year to year.  They are a video collection, rather than a photograph of one time and one place.  Raki's Rad ResourcesOthers  - the MAP test that students take multiple times during the year, and the running records that students are assessed with three times a year, are videos, showing their ability with clear details about what they know and how they’ve grown.  However, the best assessment we have worked on are our online portfoliosonline portfolios, which are truly a collection of videos, projects and self reflection which show growth and progress over the course of the year.

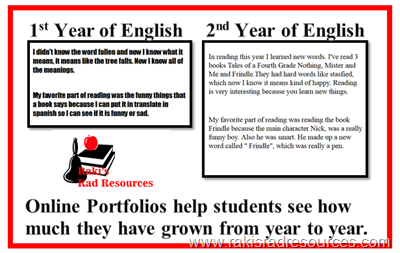
An additional benefit of the online portfolios is that the students who have been at the school for two years, can go back and look for themselves at where they were last year at this time and truly understand the growth that occurs as the years pass.  This empowers the students to reflect on what truly matters.  It’s not the number that they get at the end of the MAP test, it is the growth that occurs slowly, over the course of time. 

Online portfolios help students see how they have grown from year to year.  They are a video collection, rather than a photograph of one time and one place.  Raki's Rad Resources

This is especially apparent for ESL students.

Online portfolios help students see how they have grown from year to year.  They are a video collection, rather than a photograph of one time and one place.  Raki's Rad Resources


Online Portfolios are one of the best things I have ever done in my classroom!

Heidi Raki of Raki's Rad Resources

Saturday, June 7, 2014

The Best Discussions Start with Books

You think you have it planned right?  You’ve picked out the perfect book.  It relates to a science topic you are studying.  You pre-read the book and planned out questions.  The students are using their Read Aloud Journals to track their knowledge.  You read in a steady, fluent voice, stopping to “think aloud” as a model for students.  Everything’s going right and according to plan.  Then the hand goes up and the question comes and BAM your whole plan for the lesson spits out the door.  Has this every happened to you? 

Discussions based on books read to the class increase comprehension and student background knowledge.  Raki's Rad Resources

My class this year decided that Read Aloud was the time to ask the most off the wall questions – all with valid connections to the book or to another question asked about the book, but still things I never expected.  Here are just three examples:

1.)  We were reading about how desert people use camels to help them and got into a discussion about mammals and the mammary glad that makes milk – and where it is located in humans.  Started from the question “How do they get milk from camels? I thought only cows made milk.”

2.) We were reading a National Geographic article about an explorer’s trek across the desert and got into a discussion about visas and passports and why on some countries’ passports you can travel almost anywhere without a visa while on other countries’ passports you need lots of visas.  Started from the question “Why would they need a visa to cross into Libya?”

3.) We were reading Captain Underpants and got into a discussion about working for money vs. being handed money that spiraled into a political discussion about socialism vs. capitalism.  Started from the question “Why didn’t they just ask their mom for the $4.00?”


After a year of these type of discussions, I have found that I enjoy read aloud more than ever before because of these discussions.  I never know what connections the kids will make, but at least I know that they are connecting to whatever they are reading (or being read) and that their comprehension is benefiting from these connections.

What is the best unexpected discussion your class has ever had based on a read aloud?

Heidi Raki of Raki's Rad Resources

Friday, June 6, 2014

Desert Landscapes with Real Sand

This year I am the luckiest teacher in the world. I get to teach at the best school ever – International School of Morocco, with some of the best, most creative, teachers ever. Each time I walk into someone else’s classroom, I get inspired and we just seem to spiral great teaching ideas off of each other. It’s a wonderful place to teach, and since we are all collaborating, it’s a wonderful place for our kids to learn – a teacher’s dream, right? I have tried and tried to convince the other teachers to create blogs of their own to spotlight and share some of their amazing ideas, but everyone is super busy. Instead, they have each agreed to let me spotlight some of their ideas right here on Raki’s Rad Resources. So, each Friday night, I will be posting an ISM Spotlight.

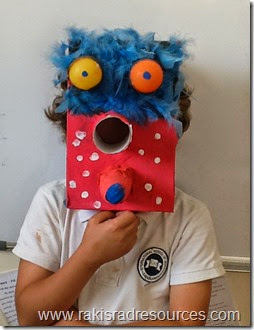
Integrating science and social studies into art - African Masks - Raki's Rad Resources One of the things I love at ISM is that an effort is always made to integrate our science and social studies topics into our enrichments – art, music and drama.  Last year, the teachers taught the enrichment classes.  I taught art and we made African masks during our Africa unit and lamps during our Machines unit.  This year, we are lucky enough to have a full time enrichment teacher, Emma Sanders, who has done a lot of integration as well, including doing marble art during a forces unit and newspaper collages of important economic articles during our economy unit.  One of my kids’ favorite integrations – and the thing that showed up time and again on their online portfolio planning sheets as their “favorite part of art” was sand art.

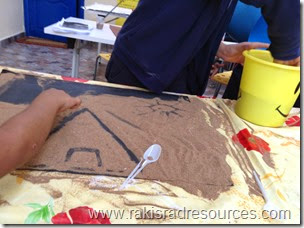
Currently, our entire school is studying the desert.  Ms. Sanders did a project with the students where they drew desert landscapes in sand.  Integrating science and social studies into art - Desert Landscapes - Raki's Rad ResourcesFirst, students poured sand on their paper and used their fingers to draw out what they wanted.  Then they took a picture of this to hold their “brainstorming” electronically.  Next, students took another piece of paper and used glue sticks to make their design.  They then sprinkled sand over the glue and voila – desert landscapes with real sand.


How does your school integrate the arts?

Heidi Raki of Raki's Rad Resources


Wednesday, June 4, 2014

Websites & Apps for to Stop the Summer Brain Drain

Recently, a parent asked me how she could use technology to help her children do something educational while they are traveling this summer.  Here are some of what I suggested to her (and my other parents) as ways to use technology to keep kids’ minds active this summer:

15 Ways Kids can Use Technology to Help Prevent Summer Slide

1.  Read Online Books:  There are so many books and stories available on the internet nowadays.  I listed 6 possible places to get good books in this blog post not too long ago, but there is also the Kindle reading app, which can be downloaded to most any device and filled with good books that can be read offline.

2.  Play Math & Logic Games:  My favorite place for logic games is Cool Math, but there are so many puzzle apps and math games out there, that you shouldn’t have a hard time finding games that meet your kids’ needs and let them have fun with math.  For a jumping off point, check out my Top 10 Math Websites blog post.

3.  Watch Educational Videos:  Kids all have topics that interest them.  Pick something that kids like (baseball, dance, cats, video games etc.) and find documentaries or other educational videos like Magic School Bus Episodes around these topics.  Great starting places for documentaries include National Geographic, the History Channel, PBS, BBC and the Discovery Channel.

4.  Blog About Places They Visit:  No matter if you are traveling the country or going on a walk around the park, kids can keep summer journals by simply blogging about the things they do and places they visit.  For some information about how I’ve done blogging with students check out my Student Blogging blog post.

5.  Create Stories:  Kids love to make up stories and technology gives them so many ways to put those stories together – Storybird, Puppet Pals, and Powtoon are three of my favorites.  You can also check out my Top 10 Writing Websites blog post for more suggestions.

6.  Find Answers to their Own Questions:  Children always have questions of their own.  Summer is a great time to let them practice using search engines while finding the answers to their own questions.  Children can use Kid-Friendly search engines like Fact Monster, online Encyclopedias like Britanica, use a basic Google search or even use YouTube’s search feature to find videos that will answer their questions.

7.  Practice Math Facts:  Keeping up with math facts is one of the easiest things that kids can do over the summer.  Websites like Mathmagician and apps like Flash to Pass help students to practice the facts, whether they are working on addition, subtraction, multiplication and division.

8.  Watch “How to” Videos to Learn a New Skill:  Students can learn so much from videos, and they often want to know how to do something, so why not let them watch how to videos to learn how to do something that interests them – to make boondagle keychains, to bake a cake, to build a wooden car, to braid hair, to play a video game etc.

9.  Create a Detailed Map of Places Visited:  If you are traveling, you can use Google Maps – or even a map background in Powtoon – to create a detailed map of the places you have visited.  Kids can add pictures and information about the places they have visited.  Check out my blog post about Summer Google Maps to see how I have done this with my own children.

10.  Create a Time Lapse Video of Your Summer with One Picture a Day: Have kids take a picture every day with one thing that stays the same in each picture – perhaps placing a teddy bear or book into a new place or position each day.  Then, kids can put the pictures together into a time lapse video using the app iMotion HD on the iPad or Stop Motions Animator for the PC.

11.  Create Your Own “High Tech/ Low Tech” Game:  Combine high tech and low tech by having kids use one of the simpler capabilities of their device – the timer, the calculator, the compass, the camera – to create a new game where they make up the rules.

12.  Geocaching:  Geocaching is a real life treasure hunt where you find the GPS address and clues online.  They can be done with the aid of a smart phone or table that has 3G, or even with the GPS device you use in your car.  Find more details in my Geocaching blog post.

13.  Be a Critique:  During the summer, children “consume” more movies, songs, games, events and books than during any other time of the year.  Give students a chance to critique what they consume.  Let them write up a review and post it on Amazon, Good Reads or Trip Advisor.  Check out this blog post on writing book reviews for more ideas.

14. Download an Instrument App and Create Your Own Songs:  There are lots of great apps out there that let you “play” instruments – like the Free Drum Set app for the iPad or the Virtual Keyboard for the PC.  Children can create their own songs and even choreograph dances to go along with them.

15. Math and Science Simulations:  There are tons of Math and Science simulations on the internet.  Even if students haven’t learned these topics, playing with simulations can help students build background knowledge that will help prepare them for future lessons, or help them connect between different topics.  PHET is a great starting point for finding simulations.


What do you suggest that students do with technology over the summer?

Heidi Raki of Raki's Rad Resources

Sunday, June 1, 2014

Writing Requirements – Perfect Handwriting or Interesting Details?

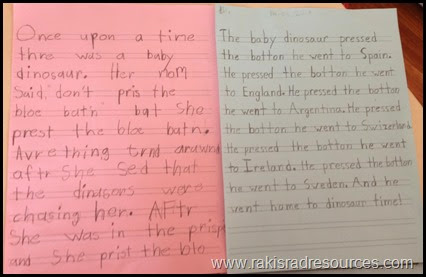
Do you ever get sick of kids asking “How long does this have to be?” or parents telling you how great their child’s writing is because they “used such great handwriting”?  Overall as a teacher (and as a person) I look for function over form, and tell my students that while I want them to have significant detail and how long shouldn’t matter.  If they have significant details, they will automatically have good length to their stories. I prefer a story makes sense, has a good details and flow to it, but has spelling or grammar mistakes over a perfectly presented story that tells me nothing or uses the same boring words used over and over.   A few weeks ago, I was talking about this with my friend, Courtney Nassar, about this and she pulled a classic example out of her Year 2 (1st grade) writing pile.  Here it is:

Which 1st grade writing sample shows promise of being a better writer?  Building details and vocabulary into a story is MORE IMPORTANT than spelling and handwriting.  Raki's Rad Resources

On the left is a story with multiple spelling and handwriting issues.  However, if you read the words, it tells a quality story with action and dialogue.  “Don’t press the blue button.”  “She was in the precipice.”  On the right is a story that has close to perfect spelling and handwriting, but goes no where. 

When talking to the kids, I always tell them that great handwriting, spelling and grammar are the icing on the cake, but that you need the eggs, flour, butter, sugar and baking powder to make an actual cake, and that is where you characters, plot, dialogue, details and suspense come in.  What analogy do you use with kids (or parents) to help them understand the difference between form and function in writing?

Heidi Raki of Raki's Rad Resources