Showing posts with label iPad Apps. Show all posts

Wednesday, December 21, 2016

10 Technology Lessons That Are Worth Making Time For

Ten technology lessons that all classroom teachers should take the time to teach. These lessons will enhance learning in all areas of curriculum. Lesson suggestions from Heidi Raki of Raki's Rad Resources.


Technology is often referred to by teachers as either an after thought or "one more thing I don't have time for". A few weeks ago, I took part in a fantastic twitter chat on the Hour of Code. During the discussion, one thing that kept coming up was "How do you have time for coding with all of the other standards?" This is a question I get all of the time with technology in general. Over the past 10 years, I have had my students create blogs, videos, online storybooks, prezis, glogs, video games, and a variety of other technology based projects, while still teaching my math, literacy, science and social studies standards. What I have found is that teaching technology skills enhances my students' learning within the "regular curriculum" so much that whatever time I give to technology is time well spent.


Technology skills transfer and spiral. The skills you teach for one technology program can easily be used within another technology program. And within this new program you're going to learn how to do something else you didn't know how to do and that will continue the spiral. Here are some of the technology skills that I have found worth taking the time out of "regular curriculm" to teach:


Ten technology lessons that all classroom teachers should take the time to teach. These lessons will enhance learning in all areas of curriculum. Lesson suggestions from Heidi Raki of Raki's Rad Resources.


1.) Logging in and logging out:
Especially with younger students, it is worth your time to spend time at the beginning of the year teaching students to how to log in and log out. Let's be honest some of our students will spend half or all of their computer time just trying to log in. Once kids can successfully log in, they can begin seeing technology as a tool to help them and not an obstacle to overcome. I am also sure to teach students about the importance of actually logging out so that another students doesn't inadvertantly begin working in your account. Like everything else, once students know how to log in and out of one account, they will quickly pick up on logging in and out of various programs and accounts.


Ten technology lessons that all classroom teachers should take the time to teach. These lessons will enhance learning in all areas of curriculum. Lesson suggestions from Heidi Raki of Raki's Rad Resources.


2.) Reading the screen: 

My students giggle at me, but I regularly tell them "Those words on the screen aren't decorations!" Teaching students to read the screen seems simple, but it can be one of the biggest struggles, especially with low readers and those with little previous technology experience. This is especially true when an error message pops up and the kids don't even read it, they just come running and calling "Mrs. Raki, there's a problem!" 
So one of the first things I teach my students is to read the screen and think about what it's asking you. If it pops up asking if you want to save your work, you know the answer to that question. If you don't know where the button is for editing, start reading all of the drop down menus. Which do you think makes the most sense? (Hello real life reading skills!)


Ten technology lessons that all classroom teachers should take the time to teach. These lessons will enhance learning in all areas of curriculum. Lesson suggestions from Heidi Raki of Raki's Rad Resources.


3.) Troubleshoot:

One of our first technology vocabulary words, that isn't a name of a piece of equipment, is troubleshoot. (For other technology words that are more specifically linked to pieces of equipment and technology techniques, download my Technology Vocabulary Word Wall Cards.) 
Once my students know what the word troubleshoot means, I regulary ask them "Can you troubleshoot that problem?" Can you figure out what is causing the problem or experiment a little to see how to fix the problem? I also teach students common problems and answers, starting with the simplest (Did you plug in the computer? Is your caps lock on?) and working to more complex problems and solutions (Click the refresh button if a website freezes. CTRL-ALT-DEL is a last case scenario that will get you out without hurting the computer too badly.) 
Once you start encouraging students to problem solve their way out of problems, you increase the chance that they'll fix the problem themselves (thereby decreasing the chance that they'll interupt you to fix it). This is also when you start seeing "peer tech support" where students help each other figure out the problem by sharing what has worked for them in the past. (Hello REAL collaboration!)


Ten technology lessons that all classroom teachers should take the time to teach. These lessons will enhance learning in all areas of curriculum. Lesson suggestions from Heidi Raki of Raki's Rad Resources.


4.) Using a search engine:
When I spend time teaching students how to properly use Google and other search engines, they quickly become efficient searchers. Then, they can use this knowledge to search up answers in every subject. They can use this knowledge to find videos to help them when they get stuck in math. They can more efficiently find research for projects in science and social studies. They can decide which is a good source to use for their persuasive writing article.
One thing I do is make sure to start out by using my Internet Research Lesson with my students so that they understand what internet research is. Then, I make sure to share with my students the search engines that I want them to use. This old blog post - How to Make Internet Research Work for Students - gives you a few of my favorite. I am also sure to clarify for my students that websites like YouTube also use a similar search engine.


Ten technology lessons that all classroom teachers should take the time to teach. These lessons will enhance learning in all areas of curriculum. Lesson suggestions from Heidi Raki of Raki's Rad Resources.


5.) Use basic functions (open, save, cut, copy, paste):
These functions can be used in pretty much EVERY program that students used, whether a stand alone program on a single computer like Microsoft Word or an internet based program like Weebly. Once students understand these basic functions, they can be transfered very easily to any new program I want to throw at them.  


Ten technology lessons that all classroom teachers should take the time to teach. These lessons will enhance learning in all areas of curriculum. Lesson suggestions from Heidi Raki of Raki's Rad Resources.


6.) Manipulating images:
Like cutting and pasting, most programs allow you to manipulate an image in a similar way, by taking a corner, stretching it out or by sending it forward or backward in an effort to layer images, etc. etc. By teaching students how to manipulate the images, they are more likely to get in there and play around with images in a large variety of ways. These skills also begin to transfer as students realize that any non-text image (ie. shapes, lines, borders, etc.) often work in a similar fashion in most programs.


Ten technology lessons that all classroom teachers should take the time to teach. These lessons will enhance learning in all areas of curriculum. Lesson suggestions from Heidi Raki of Raki's Rad Resources.


7.) Copyright information:
Start out the year with copyright information. Talk about what constitutes plagerism. Talk about public domain images. Students who know better, do better and teaching students about these copyright issues will open their eyes to what can and can't be done with the information that is out there on the internet. This will reduce the amount of essays you recieve that are copied and pasted from the internet and increase the number of citations you recieve from older students.


Ten technology lessons that all classroom teachers should take the time to teach. These lessons will enhance learning in all areas of curriculum. Lesson suggestions from Heidi Raki of Raki's Rad Resources.


8.) Internet Safety:
Don't share passwords. Don't give out any information except your first name. Don't participate in cyber bullying. Learning how to use the internet safely is an important skill for all students, even those who don't touch the internet for class, because we know they're using the internet at home. However, by opening our students up to new programs and ways to use the internet at school, they are even more likely to use this internet at home away from our watchful eyes. This makes it that much more important that students know how to use the internet safely. I start out the year with my Internet Safety Power Point and E-Quiz to make sure that this point is expressed clearly to my students from day one.


Ten technology lessons that all classroom teachers should take the time to teach. These lessons will enhance learning in all areas of curriculum. Lesson suggestions from Heidi Raki of Raki's Rad Resources.


9.) Website URLs vs. Search Engine Topics:
My students regularly type website URLs into search engines without realizing that there is a distinct difference between the two. Then they don't understand why they have to do so many more clicks. So I always take time to teach students where the address bar is and how to use it. I post the URLs that we use most regularly on a bulletin board or on the white board so that students can get used to typing them in. I stress that URLs should never have capitals or spaces in them. With the way that most internet browsers are set up today, if students add in spaces, the browser will automatically assume that you are try to put your URL through a search engine.


Ten technology lessons that all classroom teachers should take the time to teach. These lessons will enhance learning in all areas of curriculum. Lesson suggestions from Heidi Raki of Raki's Rad Resources.


10.) How to Use Your Most Commonly Used Programs: 
There will be certain programs or websites that you will use on a regular basis. Model your expectations on these programs by showing the entire class on a projector before they get onto the computers. For my class this year, I modeled how to use: IXL, Weebly, Storybird and Gaggle (our school's e-mail server). We have used other websites and programs, but these are the ones that are used most and so they are the ones that I deemed important enough to take time out of class to show the entire class how to use the programs. The other programs I use I only show to a few of my top technology students (and quickest finishers) and they in turn show the rest of the class one at a time as "tech support peer tutors". This old blog post - Technology Accounts to Create for Your Students at the Beginning of the Year - gives you some suggestions for websites you may want to introduce to your students whole group.

Teaching students some technology skills will not only help them to succeed in your class, but in their entire school (and real life) career. We must make time for this in our classrooms and realize that we are impacting learning even if these skills are not a part of our "regular curriculum".


Monday, February 9, 2015

Are You Sure You Need That New Technology?

Anyone who has read more than one blog post on this blog knows that I am a proponent of technology in the classroom.  I think that each student in each class needs to be using technology to create as often as possible.  However, I have seen a disturbing trend in technology recently.  This trend involves buying new technology because it is new and fancy, not because it is needed, or will even be used.  Often technology is purchased, but not followed through on.  Teachers aren’t trained properly.  Technology isn’t used or does not get maintained.  It begins to gather dust.  Then a new technology comes in and we spend a fortune investing in it while the old technology goes to the scrap metal bin.

We need to use the technology already in our classrooms, not purchase endless new technologies.  Article from Raki's Rad Resources 

Now don’t get me wrong, I’m a huge proponent for making sure that every classroom world wide has technology.  Students need technology that allows them to:

- access information available on the internet

- create videos, websites, projects, blog posts etc.

- interact with - learn from and teach to - others around the world

Students don’t NEED the newest technology that just came out – whether we can afford it or not.

When I attended the ECIS Technology Conference in London a few years ago, Marc Prensky reminded us that technology is NOT about having the newest and greatest technology tool.  Using educational technology should be about teaching students how to use technology – whatever technology they have – to expand their learning opportunities, connect with others and create things they couldn’t have created otherwise. 

Buying new technology is expensive and often left underused.  Instead of constantly purchasing new technology, we need to start thinking about how we can use the technology we already have.  Personally, I believe we need to spend more money on training teachers to integrate and better use the technology that is already in their classrooms, rather than buy a new tech tools if the situation doesn’t call for it.  Additionally, teachers need time built into their schedules to explore technologies – new and old - so that they can feel comfortable implementing these technologies in their classroom.

We need more time spent on training and exploring technologies before we use them in our classrooms.  Article from Raki's Rad Resources

We should also be considering how the technology will be used before buying the technology.  If a teacher is only going to be using the technology for students to play games, then students could continue to play those games on a classroom desktop rather than buying new iPads.  However, if the teacher plans to include video creation, app creation or podcasting in their lessons, than they would be using the iPads at a different level and the expense could be better justified. Unfortunately, teachers are rarely involved in the conversation about what technology should be included in their classrooms and we don’t buy technology based on the individual teacher or individual student’s needs.  Because of this, I go back to training.  If we can train our teachers to use their existing technology to the fullest capacity, then both our students and our budgets will benefit.

Most professional development programs are not training our teachers how to integrate.  That is part of the reason that I continue to publish blog posts and resources geared to helping teachers best use the technology they have.  That is the reason that my Internet Scavenger Hunts have three different possible options, allowing them to work if you have laptops, iPads, tablets, or a mixture there of.  That is the reason that my Online Portfolio Program and most of my projects – including my Online Book Report and my Historical People Research Project give teachers (and students) options on what technology they will use to present their information.  That is the reason that I have written blog posts both about Creating Videos on an iPad and Creating Videos on the Computer.  My focus – as a teacher and as a blogger – is to help students and teachers utilize whatever technology they already have to the fullest capacity of that technology.

Heidi Raki of Raki's Rad Resources

Friday, January 9, 2015

Game Press – Use this iPad App to Create Your Own Video Games

Do Your Students Create Their Own  Video Games?  Stop by Raki's Rad Resources to find out why the should be and explore an easy iPad app called Game Press to make it happen in your classroom.


Last trimester, my kiddos created their own vocabulary games with my Vocabulary Game Creation Project to work on key math vocabulary.  My oldest son is a major techie and really wanted to create a video game.  I feel that it is super important for young students to be exposed to the basics of coding, so that they are continually realizing that they are in control of the computer and not the other way around.  Learning the basics of coding teaches students:

- trouble shooting skills (which we call critical thinking when applied to a math problem)

- logical thinking (also a math concept)

- cause and effect (literacy and science concept)

- patience and persistence (life skills)

- application and creativity


So when he asked to play around with creating a video game, we downloaded an app onto our iPad called Game Press, which he used to create his video games.  The app itself is free, but with the free version, you only have three possible levels to your game.  Each level is quite short, so this makes for very short games.  We chose to upgrade for $1.99 and give him access to unlimited levels.

Within the create mode, students design a background and add characters.

Do Your Students Create Their Own  Video Games?  Stop by Raki's Rad Resources to find out why the should be and explore an easy iPad app called Game Press to make it happen in your classroom.

Then, students can assign movements to characters and create simple “if…then” statements in relation to the characters, which will dictate the movement of the characters when someone plays the game.  These “if…then” statements are created by simply drawing lines between two or more behaviors.

Do Your Students Create Their Own  Video Games?  Stop by Raki's Rad Resources to find out why the should be and explore an easy iPad app called Game Press to make it happen in your classroom.

At any moment, students can play their own games, giving them a chance to see how their actions will play out in their game.  This try and check process is key to learning how to use any new piece of technology – and is conveniently an important skill in both math and science. 

Do Your Students Create Their Own  Video Games?  Stop by Raki's Rad Resources to find out why the should be and explore an easy iPad app called Game Press to make it happen in your classroom.

In today’s society, students need to learn not just how to use technology, but how to be in control of programming new technology.  Apps like Game Press help students begin to understand the concepts of coding without having to use a programming language.  This app would make a great addition to an after school coding class or an enrichment program, but it could also be used in a general education classroom.  Here are a few helpful hints if you plan to use it in your general classroom:

1.)  Model the basics for your students.  Project from your iPad if possible, or simply work on the iPad in front of the students.  This will help students know where to get started when they begin.

2.)  Allow students to work in groups.  This helps make the most of limited resources and allows students with more technology experience to become the “experts” who help the group.

3.)  Give early finishers a chance to use “play around” with Game Press and build their expertise.

4.)  Ask students to create a slide by slide plan for their game before they begin creating.

5.)  Set specific guidelines on what MUST be included in a completed game. 

6.)  Make the first game an ongoing project or a quarter or semester long project, so that students won’t feel rushed and will be encouraged to try new things, even if it means failing the first few times.

How could you use Game Press in your classroom?

Heidi Raki of Raki's Rad Resources

Thursday, December 11, 2014

Document Student Learning with Stop Motion Studio

Create Stop Motion videos on your iPad.  Easy to do in your classroom.  Suggestions from Raki's Rad Resources 

Lego animation, claymation, stop motion animation.  These all seem like complex types of movies that we shouldn’t attempt in a classroom.  In an after school club, maybe, but definitely not in a classroom.  However, I recently discovered that these types of videos can be created quite simply with an iPad, using the app Stop Motion Studio.  This iPad app can also be used to document the creation of structures and art projects by students. 

With the free version of this app, students can take pictures of their project within this app, edit the pictures, add music and narration.  For a dollar upgrade, students can upload pictures that they have previously taken with the camera.  This upgrade doesn’t seem very important, but it allows multiple students to work on their projects using the same iPad, and when resources are limited, those little upgrades can be amazingly helpful.

My son recently used Stop Motion Studio to create this video of the Buddha sculpture he created.  He created this sculpture as his final project for the “Symbols” section of his Year Long Country Study.  He is studying China and recognized Buddha as one of the most important symbols of the country.  Rather than simply taking a picture of his sculpture, this video shows us exactly how he made it.

What project could you enhance with Stop Motion Studio?

Heidi Raki of Raki's Rad Resources

Tuesday, December 2, 2014

TESOL Teaching Tip #55 - Rules for Using Translation Applications in the Classroom

As a teacher at an International School, many of my students were English Language Learners. Even my native English speakers were living in a non-English speaking country. In addition to having Vocabulary Packets designed specifically for ESL students, I also write weekly blog posts with tips on teaching English Language Learners.

TESOL Teaching Tip #55 - Create rules for using translation applications in the classroom. Translation apps can be a great assistance to esl or ell students when used in moderation. Find information about how you can help your students at my blog - Raki's Rad Resources.

Technology can be extremely helpful when you are learning or practicing another language.  The translating apps alone are worth their weight in gold when you are stuck one word that you can’t believe you don’t know.  I have always allowed students to use translating apps when they get stuck on a vocabulary word in reading or in a math problem.  I also allow them to look up words they are stuck on when they are writing.  However with students, I always feel that using Google Translate or translating apps like iTranslate is a balancing act.  Too little use and students are left staring at a blank paper getting frustrated by the fact that they can’t formulate their thoughts.  Too much use and students translate entire paragraphs and never build their ability to think in English.  The solution, of course is moderation.  We must teach our language learning students to use translating applications moderately and responsibly.  Here are a list of rules that I use in regards to translating applications. 
rules for using translation applications in the classroom.  Great tool for ESL students, but needs to be used moderately and responsibly.  Rule suggestions from Raki's Rad Resources.
These rules must be discussed with students and enforced.  Teachers should also discuss the weaknesses of translating apps with students.  Many words have multiple meanings.  My 2nd grader tried to translate the sentence “Inventors are cool.” into Arabic the other day and got a sentence that talked about freezing inventions.  Translation devices aren’t always right.  We need to teach students to think critically about their translations.  When my 2nd grader got the mistranslation, he knew it wasn’t correct and we were able to brainstorm other words for “cool” that he could substitute and get a better result.  This type of thinking skill helps students think critically about what they are doing, but it must be taught, modeled and explained to students.
Please feel free to weigh in in the comments.  How often do you let your students use translating applications?
Heidi Raki of Raki's Rad Resources


Thursday, November 20, 2014

Recording Real Time Thinking with iPad apps

One of the most powerful things about using an iPad in the classroom is the ability of that iPad to record real time thinking and observations by students. I have written extensively in the past about the importance of using the iPad’s camera and other recording mechanisms.  For some key ideas, check out my blog posts – 10 Ways to Use Your iPad’s Camera in the Classroom  and Making Movies on the iPad: 4 Apps to Try.  Most of the time when I advocate using your iPad as a recording mechanism, it is to create well planned out movies that require brainstorming, drafting a script, creating, revising, and editing before publishing – like those planned using my Student Tutorial Video Planning Sheet.  However, there are times when you just want to do a quick check of where students are on a topic without actually sitting with each individual student.  Or you want to record a snapshot of where they are to share with parents or administrators, or to document learning or lack thereof for an RTI meeting.  The following iPad apps allow you to do just that.

iPad apps that can be used to record real time thinking.  Ideas from Raki's Rad Resources.

1.) Evernote – This amazing app allows students to have their own individualized notebook (within a teacher’s log in) – great for one or two iPads per classroom.  Within the notebook, students have notes where they can write up what they have worked on, add a picture of what they have worked on, or they can record themselves speaking.  This works great for taking a picture of a creation students have made, documenting a writing center, or recording running records.  The best part about Evernote – for me – is that there is also an application for your computer and the computer and iPad app sync, giving me access on my computer to everything students do in Evernote on the iPad.  I can then share those notes with parents, resource teachers, administrators, etc. through a simple e-mail with no need to download information off of an iPad.

iPad apps that can be used to record real time thinking.  Ideas from Raki's Rad Resources. 2.)  ScreenChomp – This program is meant to be used to create movies for other students.  In fact, it is one of the options I include in my Tutorial Video Planning Sheet.  However, unless you have a 1 to 1 iPad program, this is NOT  great option for creating the type of videos where you have to plan, do a little, save, and come back to it the next day, because Screen Chomp only offers one screen and erases everything you do unless you go ahead and create a video with it.  While this rules it out for use in one context, it makes it perfect for use on projects where you don’t want to see a lot of planning.  For example, if you want to do a spot check on where students are with a specific topic, you might ask them to do a quick 1 minute “fly through” video, where they don’t plan, but just write and talk to explain what they know about the topic.  This is a great check for understanding tool with math concepts and new vocabulary.

iPad apps that can be used to record real time thinking.  Ideas from Raki's Rad Resources.

3.)  Educreations -  This program is also meant to be used to create movies for other students.  It is a step better for this process than Screen Chomp because it offers you the opportunity to use multiple pages where you plan out a presentation.  However, you are only allowed to have one presentation going at a time (at least with the free version), so again this is hard to use for long term creation projects if you have 20 kids sharing 1 or 2 iPads. It’s also impossible to edit your recordings after you have started them.  While this makes it challenging to create full on Tutorial Videos or larger projects, it is a great way to work on idea mapping or vocabulary words.  You can easily start out a draft with one concept word or vocabulary word on each slide, have students rotate through the iPad as a center, having each group add to one slide, recording their thinking as they go.  In the end you have a full length collaborative video.  You could also let individual students create their own quick “fly through” videos on any variety of topics or concepts, including working through an assigned math problem, discussing a book they read or describing a creation they made (You CAN import pictures into Educreations very easily.)

iPad apps that can be used to record real time thinking.  Ideas from Raki's Rad Resources.

4.)  Kids Doodle – If you’re not looking for sound, but want to check on penmanship, letter formations, spelling, etc., try out Kids Doodle.  Ask students to practice writing sight words or spelling words, to copy a sentence from the board or to simply draw a picture of a certain topic.  While the students are working, this app automatically creates a video of what is going on on the screen.  These videos can be exported to your video roll and shared via e-mail.  This is a also a great way to watch the thinking that is going on during a math problem, to see who is erasing 20 times and to get a bit of a sneak peek into individual thought patterns.

iPad apps that can be used to record real time thinking.  Ideas from Raki's Rad Resources.

5.) Puppet Pals – You know those creative play moments that you wish you had on video tape to show parents?  Puppet Pals brings those moments out and lets you record them.  This app gives you a variety of backgrounds and characters to choose from (a few in the free version, many more in the paid version).  Once they choose their background, students create their own puppet show, while recording the movements of their puppets, as well as what they are saying.  I love using this app for planned out shows – retelling of stories, publishing of fiction writing, etc. etc.  However, it is also great for spur of the moment shows.  Ask students to create their own show with no planning.  The resulting videos will show you what kind of imaginative thinkers and writers you have in your class.  These videos can be saved to your video roll and then shared via e-mail or YouTube.


Heidi Raki of Raki's Rad Resources

Thursday, September 25, 2014

BYOD Resources – Apps & Websites to Use

Recently, I had an e-mail from a follower asking for suggestions on websites and apps that could be used in a BYOD (Bring Your Own Device) classroom.  The teacher’s problem was that all of her students were working on different formats.  She had some of her students on a Mac format – generally iPads, which don’t allow flash, but work great with apps, some of her students on Android tablets and Kindle Fires, which still don’t allow flash and don’t always have access to the same apps as iPads and then some of her students on regular old PC laptops, where they couldn’t get apps at all, but had access to lots of cool Flash based websites. 

BYOD - differentiating your technology options to allow for many different formats, including iPads, android tablets and PC laptops to all be used in your classroom - suggestions from Raki's Rad Resources

My suggestion to her was to get to know the resources out there.  There are a few resources – like Edmodo, LiveBinders and Google Docs that work on all platforms.  These resources are a good for projects where you want all of the students to create a nearly identical product or format – like Online Portfolios or published pieces from a Writing Journal.

 For other resources, it takes time to build up knowledge of which apps and websites work on each different format.  I suggest using Google Docs or a page on your class blog of to collect a list of great overall resources based on the three different formats.  As you, your students and their parents find new websites or apps to meet the skills and content you are working on, add these links to this document that so that is available to entire class.  In the spirit of collaboration, I have started my own collaborative Google Document with some of this information.  Feel free to add to this document and/or share it with your students and co-workers.BYOD - differentiating your technology options to allow for many different formats, including iPads, android tablets and PC laptops to all be used in your classroom - suggestions from Raki's Rad Resources

For example, if you want students to use their device to work on math facts, you might want to use Flash to Pass on iPads, Timed Math Pro for Android devices and Mathmagician on laptops.  All of these help students work on the same skill, in a similar format, but each works on a different type of device.  If you want students to work on creating a video, iPad users could use Explain Everything, Android users could use Animation Desk, and PC users could use Powtoon.

Also, try to choose activities that already have differentiated technology built in – like my Internet Scavenger Hunts, which have Type On Versions, perfect for students who have a PC with Microsoft Word, Clickable Link PDF Versions, perfect for students with Androids, like the Kindle Fire, or PCs, that are not equipped with Microsoft Word or the ability to scan QR Codes and a QR Code Version for your iPad users who can easily download a QR Code App, but often have difficulty opening PDFs.

BYOD - differentiating your technology options to allow for many different formats, including iPads, android tablets and PC laptops to all be used in your classroom - suggestions from Raki's Rad Resources.

Do you have a technology in the classroom question that you’d like answered?  E-mail me at hlraki (at) hotmail (dot) com and I will be happy to help you out!

Heidi Raki of Raki's Rad Resources


Friday, August 15, 2014

Differentiating Technology Suggestions

At the beginning of the school year, I try to provide parents with helpful websites and apps that they can use at home to support their children at home.  However, before suggesting anything, I try to find out what technology they have at home.  Once I know what technology students have access to at home, I can make suggestions that are appropriate for their particular situation.

One way to find out what technology students have at home is to send home a technology survey to parents at the beginning of the school year.  You can find this technology survey in my newly released Parent Communication Forms and Surveys packet.

Use this technology survey to know what technology your students have access to.  This information will help you differentiate your homework and better help all of your students.  Raki's Rad Resources

Once you know who in your class has iPads, who has computers and who has limited technology, put that information into lists and keep that information in your parent communication folder. 

Use this technology survey to know what technology your students have access to.  This information will help you differentiate your homework and better help all of your students.  Raki's Rad Resources

With this information, you can send app suggestions only to those students who would actually use them.  You know which students you can ask watch a video over at home or practice skills on an assigned website.  Plus, you know if a student truly doesn’t have access to technology after they leave your classroom.  I DO NOT use this information to exclude those without technology from after school technology activities.  Rather, I suggest ways that they could get access to technology – at the public library, or finding a homework buddy in class and I offer this group of students a non-technology alternative to any at home technology assignments.  The overall focus of having this information is to be able to provide more differentiated suggestions for using technology at home.

Looking for websites and apps to suggest to your parents?  Try these:

Reading Websites for Elementary Students

Math Websites for Elementary Students

Writing Websites for Elementary Students

Typing Websites for Elementary Students

ESL Apps for Elementary Students

Generally GREAT Apps for Elementary Students

Video Creation Apps for Elementary Students

Ticket Out the Door Apps for Elementary Students


Heidi Raki of Raki's Rad Resources

Thursday, May 1, 2014

Far Faria Giveaway

Far Faria - Reading App for Kids - Review and Giveaway from Raki's Rad Resource If you read my recent post about Online Books, you know how important virtual books are for my school.  So, when I was offered a chance to review the iPad app FarFaria, which has a library of 600 books, I leapt at the chance.  The books in the FarFaria app are geared for students from age 2 – age 9, which is slightly young for the grades I teach.  To give the app the best possible review, I turned to my friend and colleague, Courtney Nassar who teachers Year 1 and Year 2 (Kindergarten and First Grade).  We downloaded the app and reviewed it together.  She used it with all of her students and I used it with my younger kiddos (Year 3 & Year 4 or Second and Third Grade). 

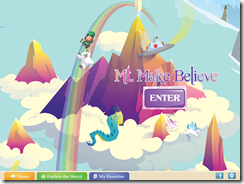
Far Faria - Reading App for Kids - Review and Giveaway from Raki's Rad ResourceWhen you first open the app, there is an absolutely amazing layout, set up like a map of FarFaria.  The map has different regions, like Mount Make Believe.  Each region is based on the genre of book you are interested in and each region has corresponding graphics so it looks to the kids like they are off on a magic journey.

Once students choose a genre, they receive a selection of books to choose from.  All of the books are leveled and the levels are marked clearly on the front cover of each book to help students choose books that are at the appropriate level for them – great built in differentiation tool for teachers.  Teachers can also sort the books based on topic, difficulty and age range.

Far Faria - Reading App for Kids - Review and Giveaway from Raki's Rad ResourcesAfter students choose a book, the book must download to the device.  This takes a minute (especially with our slow Moroccan internet) but once you download it, you can add it to your Favorites and forever have that book available OFFLINE.  This is one of our favorite features, because our internet can be in and out sometimes, so the possibility of having online books available without the internet feels like a godsend!

Once you have the books, students have the option to listen to them or read the books by themselves.  Ms. Nassar used one for read aloud and was able to project the book from her iPad for the students.  She also made the app available to the students in an independent reading center and has a few books picked out that she would like to do for Guided Reading.

FarFaria is normally $3.99 a month, with the ability to cancel at any time.  They also allow you to read one book a day completely for free WITHOUT a subscription.  In exchange for this review, I received a 6 month free subscription.  However, we liked the app so much, we have already requested funding for the app for next school year.

I have also been offered two 3 month subscriptions of FarFaria to give away to you!  This leads me to our new giveaway!!!!  In order to enter for a free 3 month subscription, simply subscribe to our monthly newsletter (which comes ones a month to let you know what is new at the blog and store, and to give you links to FREE teaching resources) and then sign up below by giving us your name and e-mail address.  The giveaway will be open until I return from work on Monday afternoon (May 5, 2014)  4:30 p.m. GMT (12:30 p.m. EST).


Heidi Raki of Raki's Rad Resources

Thursday, April 3, 2014

Five Ways to Use QR Codes in the Classroom

Five ways to use QR codes in the classroom - by Heidi Raki of Raki's Rad Resources


Has anyone seen these lovely QR codes sneaking up on teaching resources everywhere?  How can they be used?  How do they help students?  And how do we make them? Today I’ve set out to give you the down and dirty.blog qr code

QR codes are like hyperlinks for your smart phone or tablet.  To use a QR Code, you download a QR Code Scanner app onto your phone or tablet.  The app uses the built in camera to scan the code and then take you to the designated website, just like when you click on a hyperlink it takes you to a specific website.

So, in order to use QR codes in your classroom, your students have to have access to a phone or tablet.  My students use one of the 5 iPads we have in our classroom, but I have heard of many schools where students BYOD (Bring Your Own Device) and scan the QR codes with their smart phones or personal tablets.

QR codes can be used to aid in research, as an answer key or simply as an easy technology center.  Here are some suggestions for how you can use QR codes in your classroom:

Five ways to use QR codes in the classroom - by Heidi Raki of Raki's Rad Resources - Heat Internet Scavenger Hunt 1.)  Make internet research easier for your students by giving them QR codes to websites that might help them find the correct information.  I have added QR codes to the Internet Scavenger Hunts that my students have completed this year and it has made the whole process so much easier!  I print out the list of questions as well as their QR codes.  The students scan the codes to take them to the websites where they read, watch videos, play games, or generally search for their answers.  It prevents me from having to link up websites to Edmodo, gives them quality sources that they might not find on a Google search and prevents them from having to toggle between too many screens on the iPads.  I like the process so much that I am slowly going back through all of my Internet Scavenger Hunts to add QR code pages.


Five ways to use QR codes in the classroom - by Heidi Raki of Raki's Rad Resources - Problem Solving Path Poster 2.)  Post the answers online and let students use QR codes to check their work.  When my students are doing their Problem Solving Path problems, they are allowed to check their work by scanning the QR codes on the posters.  These QR codes take them to a site I have created with the answers.  This allows them to check their own work, rather than running to me to be checked repeatedly.  If they find they have gotten the wrong answer, they are given the opportunity to go back and fix their work.  Again, this can be done independently, causing students to have more control over their learning, and preventing a management issue. (Disclaimer:  Be sure to have all of the answer keys posted before starting this process.  I have fallen behind on posting the answers and boy do the kids get mad if they can’t check their work because Mrs. Raki is behind!)


3.)  Differentiate your technology center by posting different QR codes for different groups.  Since all of the QR codes will look the same, students will never know who is being asked to visit what site, making it very easy for you to give easier sites to students who struggle and difficult sites to students who need a challenge.  I often have specific sites QR coded for skills that I need certain students to work on.  Then, I can hand them the QR code they need and they can go to work.


Five ways to use QR codes in the classroom - by Heidi Raki of Raki's Rad Resources - Hallway Display4.)  Share students’ online projects by posting QR codes in the hallway.  I have long struggled with how to “showcase” all of the  online work that my students do, creating videos, Prezis,, LiveBinders, and more.  Recently, I decided to create little posters with a screenshot of their work and a QR code and hang them in the hallway.  This enabled me to easily share students’ work with parents and visitors who often have a smart phone with a QR code reader in their back pocket.  Additionally, the other classes have brought their iPads out in the hall to scan our codes and see what we’ve been working on.  So, we have brought about collaboration and prevented the need for scheduling a “showing”.


5.)  Make a grab bag of QR codes.  Push your students to try new presentation methods by making a QR code grab bag.  When given a choice, my students all want to present their information the same way – generally using whatever the newest presentation method is, currently they are stuck on Powtoon.  To get my kids out of a rut, I will create QR codes for 4 or 5 different presentation sites – Prezi, LiveBinders, Powtoon, Weebly, Animoto etc and mix the QR codes together in a bag. Then each student or group of students will grab a QR code and scan it.  Whichever site they find is the site they need to use to create their presentations.


QR code generator Now, for our final question – how do you create QR codes?  Well, there are many free QR code generator sites out there, including  http://qrcode.kaywa.com/ and http://goqr.me/.  You simply find the link that you want to link to – be sure it is the exact place you want your students to land.  Copy this link, paste it into the generator and hit submit.  The generator will then create a code that you can either download or print screen and voila, you have a QR code image.  Simple, easy, interactive and makes differentiation fun.

How do you use QR codes in your classroom?

Heidi Raki of Raki's Rad Resources


For more ways to use iPads in the classroom, click on the banner below.

ipad apps for your classroom